
To upgrade your older car with a modern digital gauge cluster, first check compatibility with your vehicle’s make, model, and wiring setup. Gather essential tools like screwdrivers, wire strippers, and a multimeter, then carefully remove the old dashboard and disconnect wiring harnesses. Install the new digital cluster, connect all wiring securely, and verify sensors are calibrated properly. Finally, customize display settings and fine-tune alerts. Keep going to learn the detailed steps for a smooth, professional upgrade.
Key Takeaways
- Verify vehicle compatibility, including wiring support and dashboard space, before selecting a modern digital gauge cluster.
- Gather essential tools, disconnect the battery, and prepare a clutter-free workspace for safe installation.
- Carefully remove the old dashboard, disconnect wiring harnesses, and label connections to ensure smooth reassembly.
- Connect the new digital cluster securely, calibrate sensors, and tidy wiring for a professional appearance.
- Configure display settings, adjust brightness and alerts, and verify system operation for optimal performance.

USANOOKS Microfiber Cleaning Cloth Grey - 12 Pcs (12.5"x12.5") - High Performance - 1200 Washes, Ultra Absorbent Microfiber Towel Weave Grime & Liquid for Streak-Free Mirror Shine - Car Washing Cloth
10x GRIP-ROOT WEAVE - TRAP MORE, WORK LESS: Ultra-absorbent microfiber towels for car Grip Root weave works like...
As an affiliate, we earn on qualifying purchases.
Assessing Compatibility and Choosing the Right Digital Cluster

Before upgrading to a digital dash, you need to verify your vehicle is compatible. Digital compatibility depends on your car’s make, model, and existing electrical system. Check if your car’s wiring can support a digital cluster and whether the dashboard area has enough space for installation. When selecting a cluster, consider features like display type, screen size, and data options to match your needs. Cluster selection also involves ensuring compatibility with your vehicle’s sensors and control modules. Some digital dashboards are plug-and-play, while others require additional adapters or modifications. Researching your specific vehicle’s requirements helps prevent future issues. Confirm compatibility carefully to ensure a smooth upgrade and ideal performance from your new digital dash. Additionally, understanding your vehicle’s contrast ratio can help you choose a display that offers clear visibility in various lighting conditions. To further ensure a successful upgrade, it’s helpful to review your vehicle’s electrical system specifications and how they align with the digital cluster’s power requirements. Examining your vehicle’s electrical system capacity is crucial, especially in older models where electrical systems might be less robust. Ensuring your vehicle’s electrical system stability is adequate can prevent potential malfunctions after installation. Also, assessing your vehicle’s electrical wiring can identify if any upgrades are necessary to support the digital cluster safely.

HOMEXCEL Microfiber Cleaning Cloth 12 Pack, 12.5 x 12.5 inch Microfiber Towels for Cars, Ultra Absorbent Washing Cloth, Lint Free Streak Free Cleaning Rags for Car, Kitchen, and Window (Grey)
Unparalleled Cleaning Performance: Our microfiber towels provide outstanding water absorption and adhesion; effortlessly absorb dirt and liquid, delivering...
As an affiliate, we earn on qualifying purchases.
Gathering Tools and Preparing Your Workspace
To guarantee a smooth digital dash upgrade, start by gathering the necessary tools and preparing your workspace. Collect screwdrivers, pliers, wire strippers, electrical tape, and a multimeter. Organize your tools beforehand to assure easy access and efficient workflow. Clear your work area of unnecessary clutter to prevent accidents and maintain workspace safety. Use a sturdy, well-lit surface to work on, and consider laying down a mat to protect your vehicle’s interior. Proper tool organization minimizes the risk of losing small parts and helps you stay focused. Before beginning, disconnect the vehicle’s battery to avoid electrical issues. Additionally, understanding aero guardian maintenance dos and don’ts and safety considerations can help you prepare for any unforeseen issues. Taking these precautions ensures your workspace remains safe and your tools are ready, setting a solid foundation for a successful digital dash upgrade. Ensuring proper electrical safety measures can prevent costly damages or injuries. Always verify that you are working with the correct electrical components to avoid mishaps.

AIDEA Microfiber Cleaning Cloth-50PK, Microfiber Towels for Cars, 12×12"
Super Absorbent: Experience the excellent quality of AIDEA all-purpose microfiber cleaning cloths; made from premium materials; offering exceptional...
As an affiliate, we earn on qualifying purchases.
Removing the Old Dashboard and Disconnecting Wiring
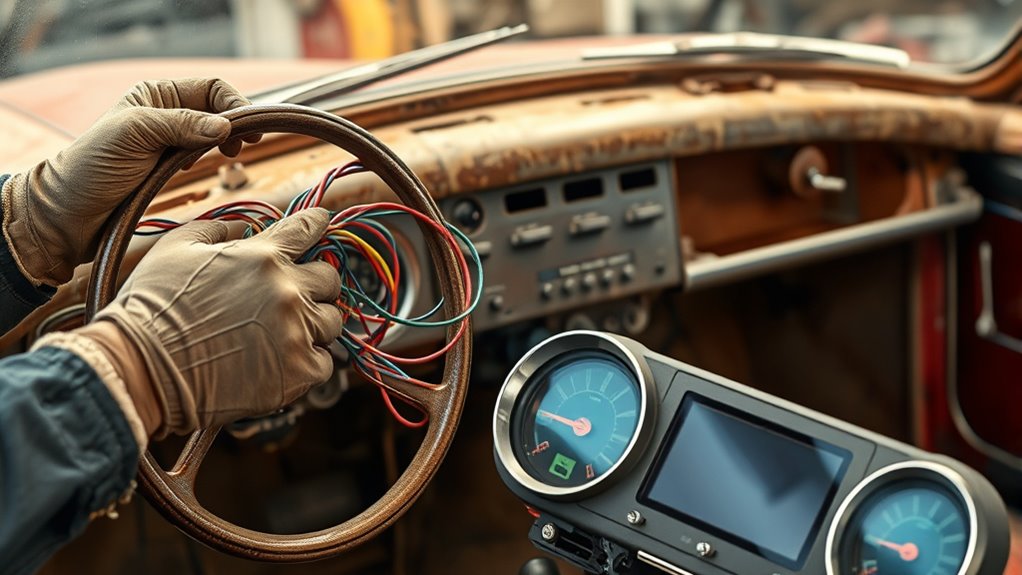
Removing the old dashboard requires careful attention to detail to avoid damaging surrounding components. Begin by disconnecting the vehicle’s battery to prevent electrical shorts. Carefully remove screws and clips securing the dashboard in place, noting their locations for reinstallation. As you proceed with the dashboard removal, pay close attention during wiring disconnection to avoid pulling or damaging wires. Be mindful of the free floating nature of the wiring harnesses, which can make disconnections more challenging if not handled gently. To facilitate a smooth process, it’s helpful to familiarize yourself with the electrical system and how the wiring harnesses are organized within the dashboard. Label all wiring connections to keep track of each connector’s position. Use appropriate tools, like wire removal hooks, to safely disconnect wiring harnesses. Keep track of screws and clips to prevent loss during disassembly. Being aware of component placement can help prevent accidental damage during removal. Additionally, understanding the wiring organization can make troubleshooting and reinstallation easier. Taking your time ensures a smooth dashboard removal and wiring disconnection process, setting a solid foundation for installing your new digital gauge cluster.

Chemical Guys, Workhorse Plush Microfiber Towels, 16 x 16 in, Black, 3 Pack
Professional Towels (MIC35303) - Premium 16x16 inch microfiber cleaning cloths for cars; designed for washing, drying, and detailing...
As an affiliate, we earn on qualifying purchases.
Installing and Connecting the New Digital Gauge Cluster
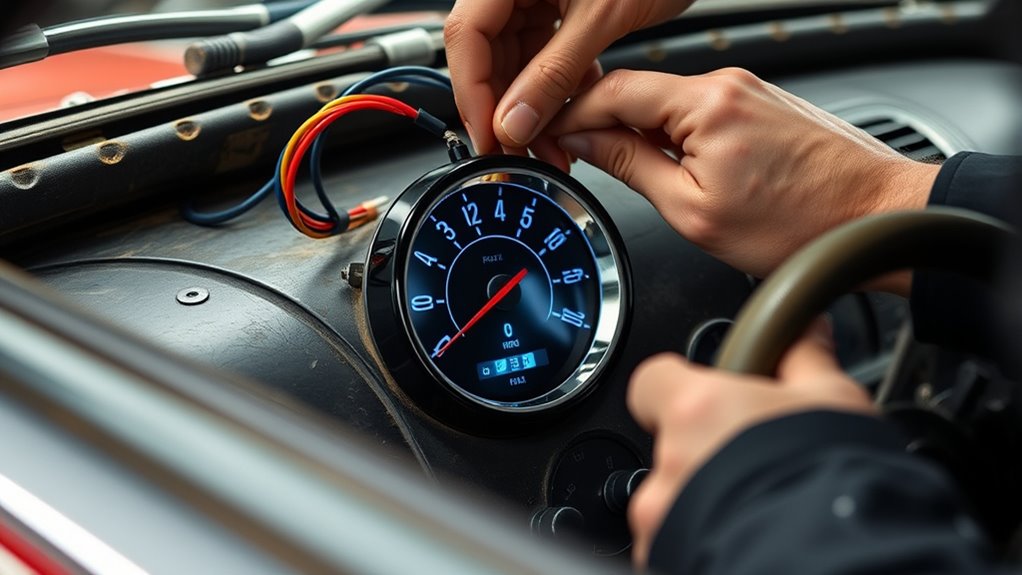
With the old dashboard cleared out, you can now focus on installing and connecting your new digital gauge cluster. Begin by aligning the cluster with the dashboard opening, then secure it in place. Next, connect the wiring harness to the back of the digital cluster, ensuring all plugs snap firmly into their ports. Proper wiring is vital for accurate readings, so double-check each connection. Once wired, power up the system and proceed with sensor calibration. This step guarantees your gauges display correct data from your vehicle’s sensors, such as speed, fuel, and temperature. Carefully follow the manufacturer’s instructions during calibration to avoid errors. After confirming everything works correctly, tidy up the wiring, hide any excess cables, and secure the cluster for a sleek, professional look. Additionally, consider integrating local automation features that can enhance your vehicle’s digital interface and overall functionality. Understanding self‑defense strategies can also be beneficial if you plan to customize or troubleshoot your setup. Remember that proper electrical connections are crucial for safety and reliable operation.
Configuring Settings and Finalizing the Installation

Once you’ve securely installed and calibrated your digital gauge cluster, it is vital to configure its settings to match your preferences and vehicle specifications. Start by steering the user interface to access display calibration options, ensuring readings are accurate and easy to read. Adjust brightness, contrast, and color schemes to suit your visibility needs. Fine-tune alert thresholds for speed, fuel, or temperature warnings to prevent false alarms. Familiarize yourself with customization features, such as layout options or data display preferences, to optimize your driving experience. Proper configuration ensures your digital dash is both functional and intuitive, providing reliable information at a glance. Take your time to explore these settings thoroughly for a seamless, personalized upgrade. Understanding vehicle compatibility is also essential to ensure your digital cluster functions correctly with your specific car model. Additionally, reviewing power supply requirements can help prevent installation issues related to electrical load and stability. Ensuring electrical integration aligns with your vehicle’s wiring can prevent potential malfunctions and ensure seamless integration. Being aware of software updates can also help maintain optimal performance and compatibility over time.
Frequently Asked Questions
Can I Retrofit a Digital Cluster Into Any Vehicle Model?
You can’t retrofit a digital cluster into any vehicle model because retrofit compatibility varies widely. Some cars have electronic systems that support digital clusters, but others face limitations due to outdated wiring or incompatible interfaces. Before starting, check your vehicle’s specifications and consult professionals to understand digital cluster constraints. This ensures you avoid costly mistakes and find a solution that fits your car’s wiring and electronic architecture.
How Long Does the Installation Process Typically Take?
Ever wonder how long it takes to upgrade your car’s dash? Usually, the installation process takes around 4 to 8 hours, but it depends on the process complexity and your vehicle’s make. If you’re comfortable with automotive work, you might do it faster. However, professional installation guarantees everything fits perfectly and functions correctly. Are you ready to plan your upgrade timeline?
Will Installing a Digital Gauge Cluster Affect My Vehicle’s Warranty?
Installing a digital gauge cluster can affect your warranty, depending on manufacturer policies. If the installation causes damage or if the manufacturer considers it tampering, your warranty might be voided or limited. Always check your vehicle’s warranty terms and consult with the manufacturer or dealer beforehand. Some manufacturers may allow upgrades if done professionally and with genuine parts, so understanding warranty implications helps you avoid unexpected costs down the line.
Are There Any Legal Considerations for Replacing the Dashboard?
Replacing your dashboard may seem straightforward, but legal considerations like vehicle registration and emissions compliance could complicate things. You need to make certain your new digital gauge cluster meets local regulations and doesn’t void your warranty. Failing to do so might cause issues during inspections or when updating vehicle registration. Always check with local authorities or a professional installer to confirm that your dashboard upgrade adheres to all legal requirements.
What Are the Most Common Issues After Installing a Digital Cluster?
After installing a digital cluster, you might face software glitches that cause the display to freeze or reset unexpectedly. Calibration challenges can also occur, making gauges inaccurate or inconsistent. These issues often stem from incompatibilities with your vehicle’s electronics or improper setup. To minimize problems, verify the software is up to date and follow calibration instructions carefully. Regularly check for updates and consult professionals if issues persist.
Conclusion
Once you’ve completed the upgrade, your car’s interior transforms like a butterfly emerging from its cocoon—modern, sleek, and full of potential. With the new digital gauge cluster in place, you’ll enjoy clearer displays and advanced features that bring your vehicle into the future. Just remember, a successful installation is the bridge between your old ride’s charm and today’s technology, turning your dashboard into a command center that’s ready to take on the road ahead.