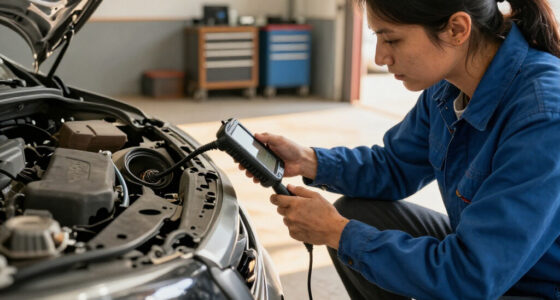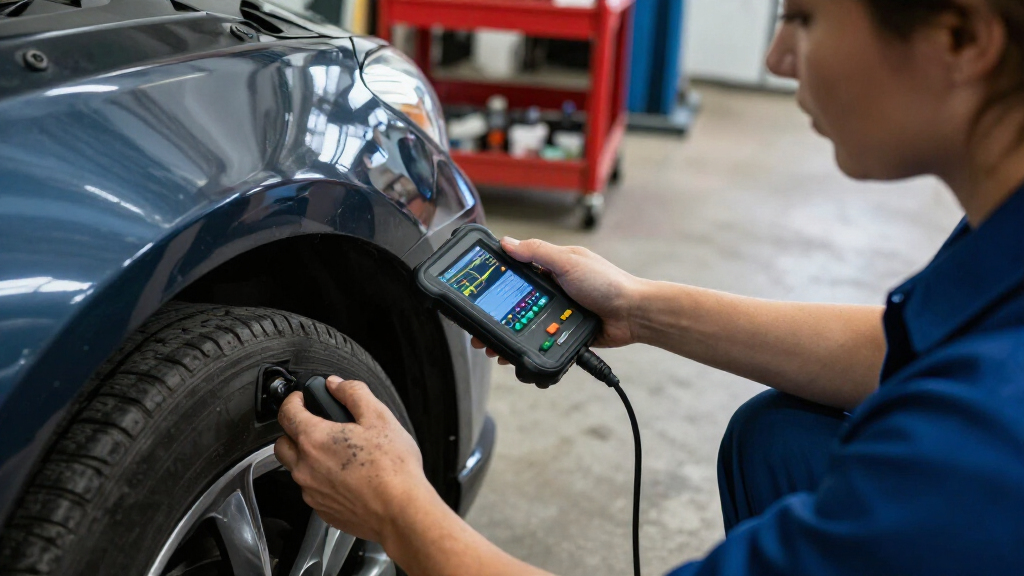
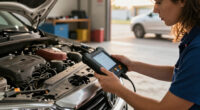
This guide shows you how to connect a car diagnostic scanner, read and record trouble codes, and use the results to plan your next step. It is for drivers with little or no diagnostic experience who want to investigate a warning light, such as the check-engine light. You will need about 15-30 minutes. A scanner can point to a system or condition that needs attention; a code alone does not confirm which part has failed.

Get business pricing on garage and car supplies
- Business-only prices and quantity discounts
- Tax-exempt purchasing
- Multiple users, one account, clear invoices

FOXWELL NT301 OBD2 Scanner with Live Data
- ✔ Brand and model: FOXWELL NT301
- ✔ Vehicle interface: OBD II
- ✔ Screen: 2.8-inch color screen

ANCEL AD410 OBD2 Vehicle Code Reader
- ✔ Brand and model: ANCEL AD410
- ✔ Display: 2.4-inch color display
- ✔ Vehicle compatibility: Most 1996+ U.S. OBD II vehicles; many 2000+ EU and Asian OBD II vehicles

ANCEL AD310 OBD II Scanner and Engine Code Reader
- ✔ Brand and model: ANCEL AD310
- ✔ Vehicle interface: OBD II
- ✔ Supported protocols: KWP2000, J1850 VPW, ISO 9141, J1850 PWM, CAN
Difficulty: Beginner | Time: 15-30 minutes
What You’ll Need
Tools & Materials:
- An OBD-II scanner compatible with your vehicle
- Your vehicle’s owner’s manual
- A phone or notepad to record codes and symptoms
- A flashlight, if the diagnostic port is hard to see
Knowledge:
- Basic ability to use a scanner’s buttons or companion app
- Ability to identify your vehicle’s make, model, year, and engine
Most cars and light trucks sold in the United States from model year 1996 onward use OBD-II. Requirements and connector access vary by country, vehicle, and model year. Check the scanner’s compatibility list and your owner’s manual before starting. Park on a level surface, set the parking brake, and keep clear of moving parts. If the check-engine light is flashing, the engine is running roughly, or you notice smoke, overheating, or a strong fuel smell, stop driving and arrange professional help.
FOXWELL NT301 OBD2 Scanner with Live Data
The NT301 earns the top spot for drivers who want to see more than a stored code. It reads and clears engine faults, checks I/M readiness and can display live sensor readings as graphs, helping us follow changes in engine data rather than interpret a single number in isolation. Its readiness hotkeys and red-yellow-green LED make emissions status easier to scan at a glance. Compared with the ANCEL AD410, the NT301 emphasizes graphable data and quick status cues; the AD410 instead offers on-screen code definitions and multilingual support. The AD310 is more basic still, without the same stated graphing tools or color display. The tradeoff is narrow coverage: the NT301 does not scan ABS, SRS or TPMS, and it lacks service resets, key programming and manufacturer-specific full-system scanning. Some tests, including EVAP functions, depend on the vehicle. Choose it for engine troubleshooting and readiness checks, not broad workshop diagnostics.
Pros:
- Displays and logs live sensor data in graphs.
- Readiness hotkeys and LED status cues make monitor checks quick to read.
- Color screen is designed for daylight readability.
- Powered by the vehicle diagnostic port, with no internal battery.
Cons:
- Does not diagnose ABS, SRS or TPMS systems.
- Does not provide service resets, key programming or battery health testing.
- Vehicle compatibility and EVAP test availability vary.
Best for: Drivers who want to view and graph engine sensor data while checking codes and emissions readiness.
Not ideal for: Owners who need ABS, airbag, TPMS or transmission diagnostics, service resets, or manufacturer-specific full-system coverage.
Bottom line: For engine-focused scanning, the NT301 offers the most useful live-data presentation in this group, provided its system coverage matches your needs.
“For engine-focused scanning, the NT301 offers the most useful live-data presentation in this group, provided its system coverage matches your needs.”
ANCEL AD410 OBD2 Vehicle Code Reader
The AD410 is the approachable middle ground in this lineup. Its 2.4-inch color display and on-screen code definitions can help a first-time scanner owner make sense of a fault without immediately switching to a separate reference. It covers common engine and emissions tasks—reading and clearing codes, checking live data and freeze-frame information, and viewing readiness, O2 sensor and EVAP test information where supported. Compared with the FOXWELL NT301, the AD410 is a better match for shoppers who value readable definitions and a simple color interface; the NT301 is stronger when graphing sensor data and checking readiness at a glance are priorities. The AD310 provides similar core code and readiness functions but has a more basic display experience. The AD410 still has a clear boundary: it does not scan ABS, SRS or transmission systems, provide bidirectional control, or perform service resets. Its compatibility can vary, so confirm your vehicle supports the tests you want.
Pros:
- Combines code reading and clearing with live data, freeze-frame and readiness functions.
- Color screen and on-screen code definitions support quick interpretation.
- Includes O2 sensor and EVAP test functions when supported by the vehicle.
- Powered through the OBD II port, with no separate battery or phone app required.
Cons:
- Limited to engine and emissions-related diagnostics.
- Does not support ABS, SRS, transmission, bidirectional control or service resets.
- Supported functions vary by vehicle.
Best for: Newer DIY users who want a color screen, code definitions and a broad set of engine and emissions checks.
Not ideal for: Buyers who need advanced system coverage, bidirectional control, service resets, or graphing as their main data tool.
Bottom line: The AD410 is a clear, beginner-friendly engine code reader when its on-screen guidance matters more than expanded system coverage.
“The AD410 is a clear, beginner-friendly engine code reader when its on-screen guidance matters more than expanded system coverage.”
ANCEL AD310 OBD II Scanner and Engine Code Reader
The AD310 suits drivers who want a direct route to common engine-code information without extra interface features. It reads and clears emission-related trouble codes, displays live data and freeze-frame information, and reports I/M readiness and vehicle information. Its vehicle-powered setup means there is no battery or charger to manage, while the 2.5-foot cable offers some flexibility when connecting at the diagnostic port. Compared with the AD410, the AD310 does not offer a color screen or the same stated on-screen code definitions; the AD410 is easier to navigate when a visual explanation is useful. Against the FOXWELL NT301, the AD310 gives up graphing and readiness LED cues, making it less suited to readers who want to track sensor changes visually. Its strength is simplicity, but the basic format comes with basic scope: it supports OBD II engine and emissions checks only, not ABS, SRS or transmission diagnostics. It also does not support OBD I vehicles.
Pros:
- Reads and clears emission-related trouble codes.
- Displays live data, freeze-frame information and I/M readiness.
- Compact scanner with a flexible, insulated 2.5-foot cable.
- Draws power from the OBD II port, so no batteries or charger are needed.
Cons:
- Limited to emission-related diagnostics.
- Does not provide ABS, SRS or transmission diagnostics.
- Does not support OBD I vehicles.
Best for: Drivers who want a straightforward, vehicle-powered reader for basic OBD II engine and emissions checks.
Not ideal for: Shoppers who want graphing, a color interface, on-screen code definitions, OBD I support or diagnostics beyond engine and emissions.
Bottom line: The AD310 covers the OBD II basics in a simple format, but the AD410 and NT301 offer stronger guidance for buyers who want more visual help.
“The AD310 covers the OBD II basics in a simple format, but the AD410 and NT301 offer stronger guidance for buyers who want more visual help.”
As an Amazon Associate we earn from qualifying purchases.
Before You Start
Keep the trouble codes in place until you have recorded them and reviewed the vehicle symptoms. Clearing codes can erase useful diagnostic information and may reset emissions readiness monitors. Read the scanner instructions: some models connect with the ignition off, while others prompt you to switch it on. Do not start the engine unless the scanner’s directions or a specific live-data check calls for it.
Step-by-Step Instructions
Step 1: Locate the diagnostic port
Switch the ignition off and look for the OBD-II port under the dashboard, usually near the steering column. Check behind a small cover or consult the owner’s manual if you cannot find it. The port is a trapezoid-shaped socket with 16 pins. Do not force a connector into a socket that does not match.
Tip: Use a flashlight to see the port. Avoid pulling on nearby wiring or removing dashboard panels unless the manual instructs you to do so.
Check: You can see an unobstructed 16-pin port and can reach it without moving the vehicle.
Step 2: Connect the scanner
With the ignition off, align the scanner plug with the port and press it in gently until it is seated. For a Bluetooth or Wi-Fi adapter, connect the adapter first, then open its recommended app. Follow the scanner’s instructions for pairing. If the plug resists, stop and check its orientation rather than pushing harder.
Tip: Some adapters draw a small amount of power while plugged in. Disconnect one when the car will sit unused, unless its manufacturer says otherwise.
Check: The scanner powers on or the app detects the adapter, and the plug remains seated without strain.
Step 3: Switch the ignition to the required position
Follow the scanner’s prompt. Most basic code reads require the ignition in the on position with the engine off. In vehicles with a push-button start, press the start button without pressing the brake to switch the ignition on; the exact sequence can vary, so check the owner’s manual. Keep the engine off unless the scanner asks for it.
Tip: If the display remains blank, check that the connector is fully seated and that the vehicle battery has enough charge. Avoid repeated start-button presses that start the engine unexpectedly.
Check: The scanner shows a menu or a message that it is communicating with the vehicle.
Step 4: Select the vehicle and read fault codes
Select the vehicle details if the scanner asks for them. Choose a menu option such as “Read Codes,” “Trouble Codes,” or “Diagnostic Codes.” Wait for the scan to finish, then note every code exactly as displayed, including its letter and all digits. Record whether the scanner labels a code as pending, stored, or permanent.
Tip: A code that begins with P relates to the powertrain; B, C, and U codes generally refer to body, chassis, and network systems. Scanner menus and code coverage differ, especially for systems beyond basic engine diagnostics.
Check: You have a written or saved list of the codes and their status. If no codes appear, record that result too.
Step 5: Record symptoms and freeze-frame details
Write down when the warning light appeared and what the car was doing: speed, engine temperature, weather, fuel level, and any changes in noise, smell, or performance. If available, open “Freeze Frame” or “Fault Details” and record the displayed conditions for a stored code. This information can help explain when the vehicle detected a problem.
Tip: Do not treat freeze-frame values as a live reading. They usually capture data from the time a fault was detected.
Check: Your notes include each code, its status, symptoms, and any available freeze-frame information.
Step 6: Look up what each code means
Use the scanner’s code description as a starting point, then consult reliable repair information for your specific vehicle and engine. Compare the code with the symptoms and freeze-frame details. A code often identifies a circuit, system, or detected condition; it does not prove that the named sensor or component needs replacement. Check for technical service information or known model-specific issues when available.
Tip: Avoid buying parts based only on a short code description. A loose connection, damaged wire, air leak, or another fault can produce a similar code.
Check: You can describe what system the code points to and have a reasonable next diagnostic step, without assuming the code names a confirmed failed part.
Step 7: Check live data if it will help
Select “Live Data” or “Data Stream” if your scanner supports it and you know what values you are checking. Begin with the engine off if the scanner allows it. Only run the engine for a reading that requires it, and keep hands, clothing, and cables away from belts, fans, and hot surfaces. Record the value, unit, and whether the engine was cold, warm, or running.
Tip: Generic scanners show different data sets and may label values differently. Compare readings with vehicle-specific service information before deciding that a value is abnormal.
Check: You have relevant readings with their units and test conditions, or you have skipped this optional step because your scanner or reference information is limited.
Step 8: Choose a repair or diagnostic next step
Use the codes, symptoms, and any supporting readings to decide whether to carry out a simple check, seek a qualified technician, or stop driving. A loose fuel cap is one possible cause of some emissions codes, but follow your vehicle’s manual and do not assume that tightening it will solve every code. Arrange prompt service for serious symptoms or warning lights that indicate a safety or engine problem.
Tip: If the fault involves brakes, steering, airbags, high-voltage hybrid or electric systems, or an unknown electrical issue, use a technician with the right training and equipment.
Check: You have a specific next action, such as checking a manual-listed item, booking diagnostic service, or arranging a tow because the vehicle is unsafe to drive.
Step 9: Disconnect the scanner and save your notes
Switch the ignition off, then unplug the scanner by holding its connector rather than pulling the cable. Close the app or follow the scanner’s shutdown instructions. Keep your code list and symptom notes for a repair visit or a later comparison.
Tip: Do not select “Clear Codes” just to turn off a warning light. Clear codes only after the cause has been addressed and you understand the effect on readiness monitors and diagnostic records.
Check: The scanner is disconnected, the ignition is off, and your diagnostic information is saved.
Common Mistakes to Avoid
- Replacing a part because its name appears in the code description. — Treat the code as a clue. Check wiring, connectors, related systems, symptoms, and vehicle-specific diagnostic information before buying parts.
- Clearing codes before recording them. — Write down every code and its status, and save freeze-frame details first. Clearing can remove information useful to diagnosis.
- Forcing the scanner plug into the port. — Check the plug orientation and port location. Stop if it does not seat with gentle pressure.
- Driving with a flashing warning light or severe symptoms while trying to gather more data. — Stop when the engine runs roughly, overheats, or shows signs of a serious fault. Arrange professional assistance instead of continuing the scan or drive.
Troubleshooting
Problem: The scanner does not power on.
Solution: Check that the connector is fully seated and that the ignition is in the position specified by the scanner. Review the owner’s manual for the port location. If the vehicle battery is weak or the port has no power, have the electrical supply checked.
Problem: The scanner powers on but cannot communicate with the vehicle.
Solution: Confirm that the scanner supports the vehicle’s model year and systems. Turn the ignition off, reconnect the plug, and try again using the correct ignition position. If communication still fails, a fuse, port wiring, or vehicle network fault may need diagnosis.
Problem: The scan reports no codes even though a warning light is on.
Solution: Check whether the scanner can read the system that triggered the light; basic tools may only access engine and emissions codes. Confirm that the ignition is on and try the appropriate module menu. Use a compatible enhanced scanner or request a professional scan if the light remains.
Problem: The code returns after a repair or disappears temporarily.
Solution: Save the returning code and note when it appears. Some faults need specific driving conditions before they are detected again. A disappearing light does not prove the cause is fixed; ask a technician to inspect recurring codes and confirm the repair.
What Success Looks Like
You have read and saved the scanner’s codes and statuses, recorded the symptoms and any useful freeze-frame or live-data details, and selected a safe next action. A successful scan does not by itself mean the vehicle is repaired. After a repair, verify the result by following the repair instructions and checking for returning warnings or codes under appropriate conditions.
Next Steps
Give your code list and symptom notes to the repair technician, or use vehicle-specific service information for the next diagnostic check. After a confirmed repair, follow the scanner and vehicle instructions before clearing codes, then monitor the vehicle for returning warnings. Arrange professional diagnosis if a code returns, the symptoms worsen, or the vehicle may be unsafe to drive.
Frequently Asked Questions
Can a diagnostic scanner tell me exactly which part to replace?
Usually not. A code reports a detected condition or affected system. Further checks may be needed to distinguish a failed part from a wiring, connection, leak, or related-system problem.
Can I use an OBD-II scanner while the engine is running?
Some live-data checks require the engine to run, while reading stored codes commonly does not. Follow the scanner instructions, keep clear of moving and hot parts, and do not run the engine in an enclosed space.
Should I clear a code after reading it?
Do not clear it before you have recorded the code, status, and available freeze-frame details. Clearing does not repair the fault and may reset emissions readiness monitors. Clear it only as part of an informed repair process.
Will a basic scanner read ABS or airbag codes?
Many basic scanners read engine and emissions codes only. ABS, airbag, transmission, and other module access depends on the scanner and vehicle. Check the scanner’s coverage for your exact vehicle before relying on it for those systems.
What should I do if the check-engine light is flashing?
A flashing check-engine light can signal a fault that may damage the vehicle. Reduce driving and stop in a safe place. If the light continues flashing or the engine runs poorly, arrange professional help or a tow.