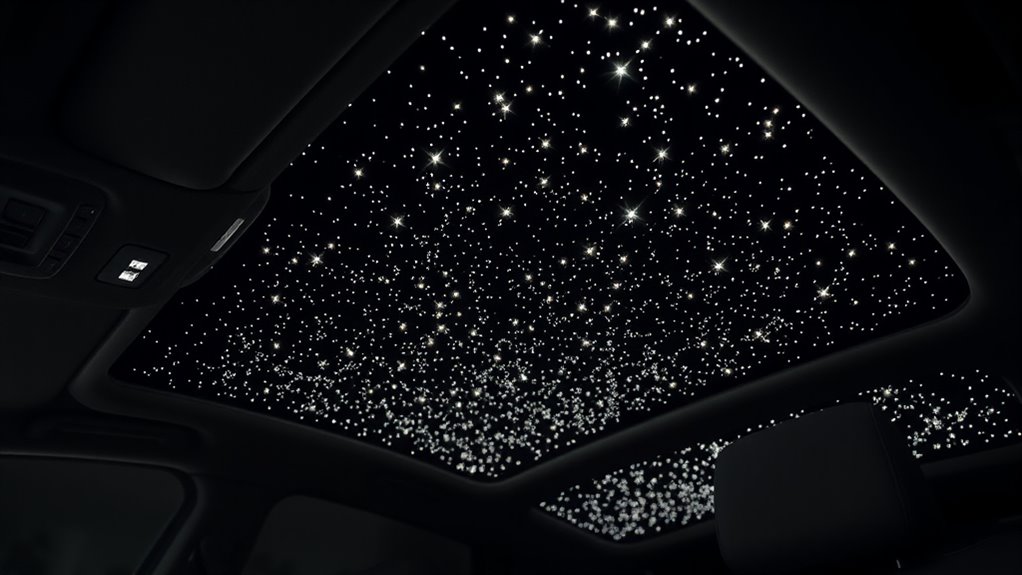

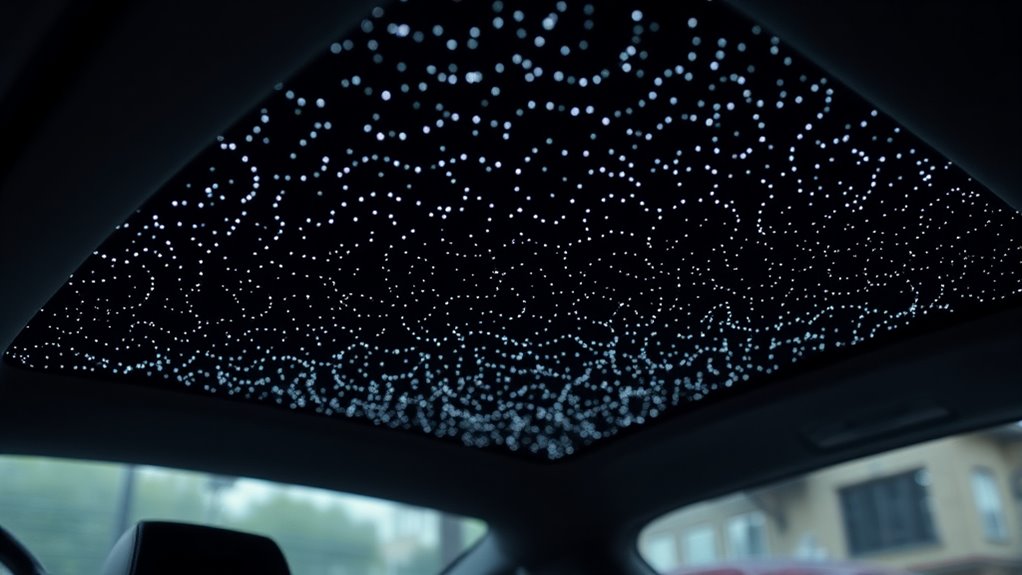
To turn your car ceiling into a starry night, start by gathering flexible LED strip lights, fiber optic cables, adhesive, and a power source. Prepare the surface by cleaning and priming it, then carefully install the fiber optic cables in your desired star pattern, securing them with clips or adhesive. Connect everything to a controller, test the lights, and secure all wiring. If you keep exploring, you’ll discover detailed steps to make your dream interior glow.
Key Takeaways
- Gather flexible LED strips, fiber optic cables, adhesive, and tools, ensuring compatibility with automotive surfaces.
- Prepare the car ceiling by cleaning, repairing, and applying a suitable surface primer for optimal adhesion.
- Lay out and secure fiber optic cables in a star pattern, connecting them to LED controllers for effect control.
- Use automotive-specific adhesive to attach the headliner, wiring, and decorative accents securely.
- Test the lighting setup, customize colors and brightness, and secure all wiring for a safe, personalized starry sky.
Gathering Materials and Tools Needed
Are you ready to transform your car’s interior into a starry night sky? First, gather your materials and tools. You’ll need an LED strip designed for interior lighting, preferably flexible and with multiple color options. An adhesive spray is essential to secure the LED strip to the ceiling surface without bulky clips. Make sure to have a clean cloth, scissors for trimming the strip, and a power source compatible with your LED lights. You might also want a marker to mark placement points. Double-check that the adhesive spray is suitable for your ceiling material to avoid damage. Preparing all your materials beforehand guarantees a smooth installation process, saving you time and frustration. Additionally, understanding the importance of proper color accuracy can help you select LED lights that produce realistic starry effects. It’s also helpful to familiarize yourself with adhesive compatibility to ensure the adhesive works well with your car’s ceiling material. Being aware of energy-efficient lighting options can further enhance your project by reducing power consumption and extending the lifespan of your lights. Considering lighting placement can also help create a more natural and immersive starry sky. Moreover, exploring sound-activated lighting options can add dynamic effects that sync with music or ambient noise, elevating your starlit experience.
Preparing the Car Ceiling Surface
Before attaching the LED strip to your car’s ceiling, you need to prepare the surface properly. Start by removing the headliner, which often involves interior lighting disassembly. This step ensures a smooth, clean surface for your DIY starlight project. Next, clean the ceiling thoroughly to remove dust, grease, and debris, which can interfere with adhesion. Proper cleaning also helps enhance the effectiveness of the adhesion process for your materials. To further improve the bond, consider using a surface primer suitable for automotive materials. Additionally, selecting the right adhesive type can help ensure a long-lasting installation. Finally, inspect for any damage or loose material, repairing as needed to prevent sagging or peeling later. Proper preparation guarantees that your fiber optic or LED strip stays securely in place and looks professional. Remember, a clean, well‑prepared surface is key to achieving a flawless starry night effect inside your vehicle. Ensuring proper ventilation considerations during installation can also help prevent moisture buildup that might damage the materials over time. Additionally, checking your surface condition with simple tests can help identify issues before installation.
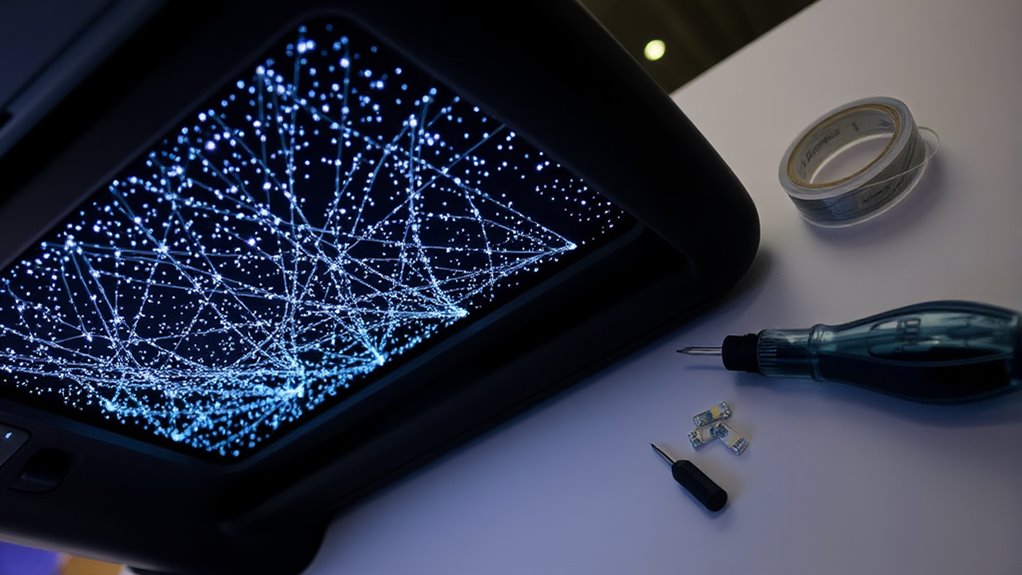
Installing the Fiber Optic Lights
To install the fiber optic lights, carefully lay out the fiber optic cables along the prepared ceiling surface, ensuring they follow your desired star pattern. Use a gentle hand to avoid damaging the delicate strands. Once positioned, secure the cables with small clips or adhesive to keep them in place. Connect the fiber optic cables to your LED controllers, which will power and control the lighting effects. Make sure the connections are tight and secure for consistent illumination. Test the setup before finalizing to confirm the lights glow evenly and the pattern looks right. Adjust the placement if needed. This step transforms your ceiling into a mesmerizing night sky, bringing your DIY starlight headliner to life with a simple, effective installation process. Properly handling delicate fibers ensures your installation remains intact and visually stunning, while understanding navigation and mapping principles can help you plan complex star patterns more accurately.
Securing and Finishing the Headliner
Once you’ve confirmed that all fiber optic cables are securely positioned and the lights are functioning properly, it’s time to start securing the headliner in place. To guarantee your starry sky stays intact, follow these steps:
- Use a high-quality adhesive designed for headliner materials, applying it evenly to avoid sagging or bubbles.
- Incorporate decorative accents, like small LED spots or glow-in-the-dark elements, to enhance the night sky effect and add personal style.
- Prioritize safety considerations by ensuring no wires or cables are pinched or exposed, reducing the risk of damage or electrical issues.
- Consider integrating electric power options such as remote control or automation, to customize your starry night experience with ease.
- For added home safety, ensure all wiring is properly secured and insulated to prevent potential hazards while driving.
- Additionally, check that your fiber optic lighting setup is compatible with your vehicle’s electrical system to ensure reliable operation and longevity.
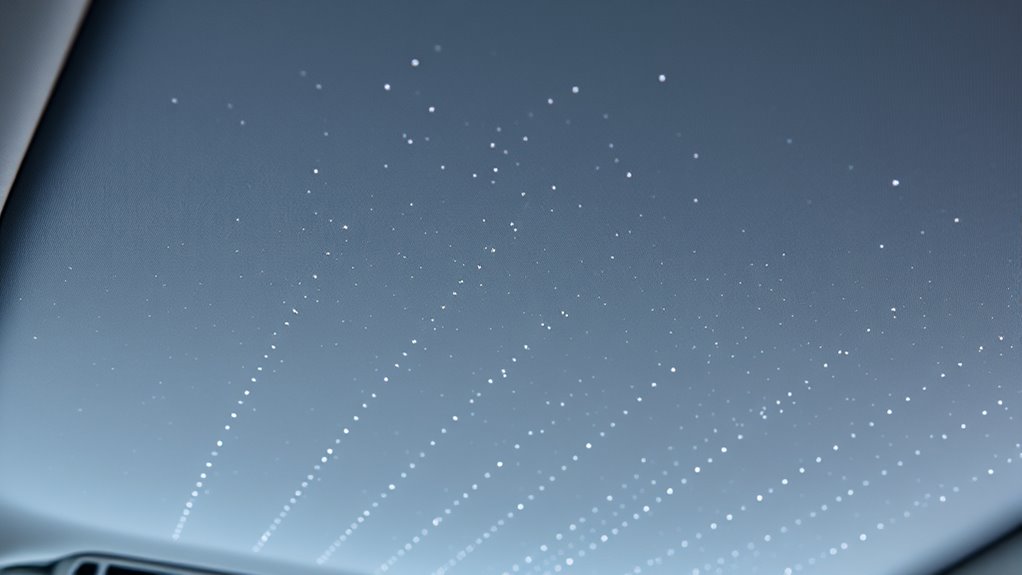
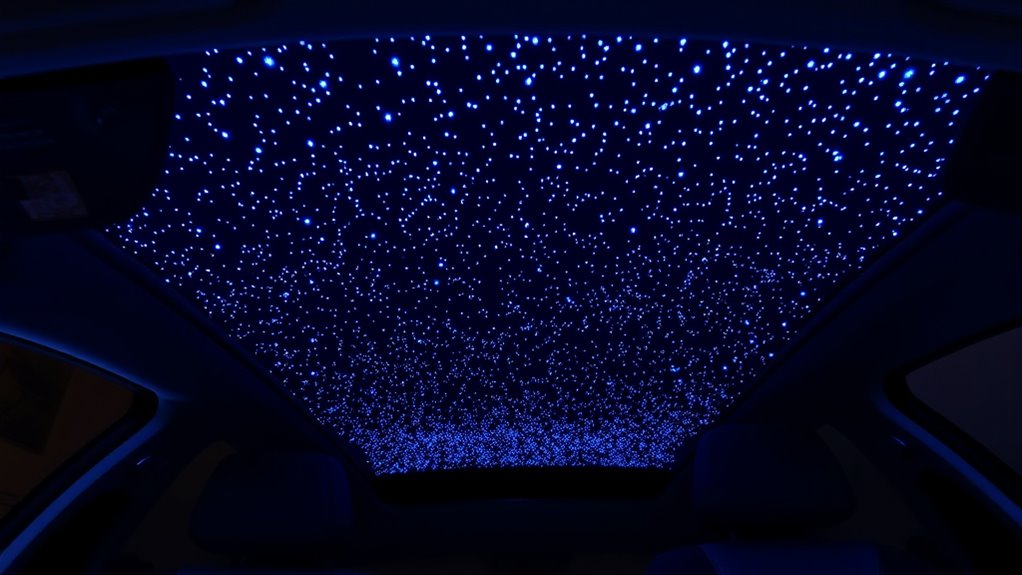
Testing and Customizing Your Starry Sky
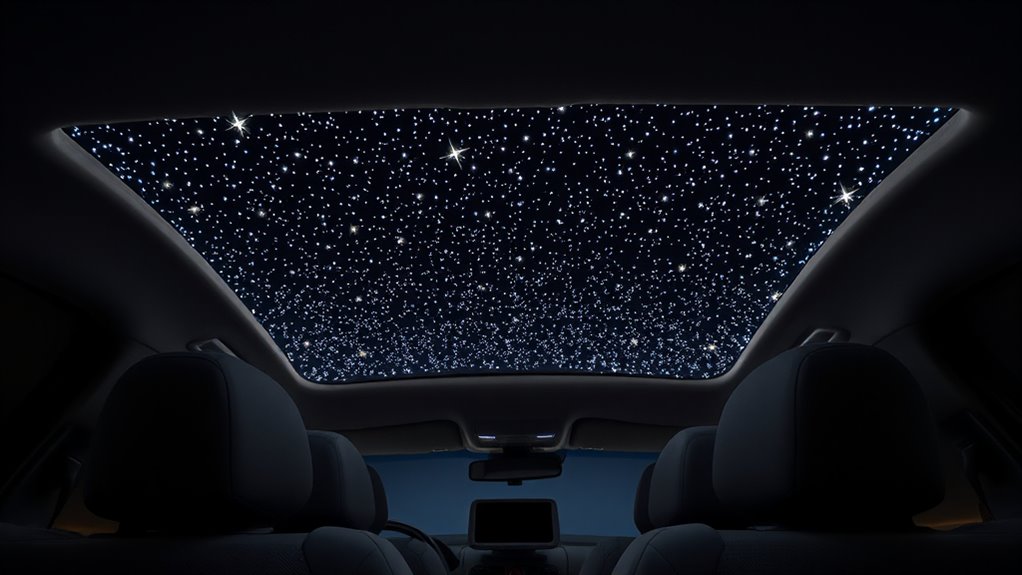
After securing the headliner and ensuring all wiring is safely tucked away, it’s time to test your starry sky setup. Power on the LEDs to see how the ambient lighting creates your night sky. Experiment with different LED configurations to achieve the desired effect—whether a gentle glow or a more vibrant constellation display. Adjust the brightness and color settings, if available, to customize the atmosphere to your liking. Check for even light distribution, ensuring no dark spots or overly bright areas. Use a remote or app, if your system supports it, for quick adjustments. To further enhance your experience, consider light diffusion techniques to achieve a more natural and uniform starry effect. Understanding how passive voice can impact your writing clarity will help you communicate more effectively. Additionally, exploring lighting control options can provide more precise customization of your starry sky. Once satisfied, secure all wiring firmly, and enjoy your personalized, celestial-inspired interior whenever you hit the road.
Frequently Asked Questions
How Long Does the Entire DIY Process Typically Take?
The entire DIY process usually takes about 4 to 8 hours, depending on your skill level. If you’re experienced with car modifications, you might finish closer to 4 hours, but beginners should plan for up to a full day. The time estimate includes removing the headliner, installing the fiber optics, and reassembling. Your skill level impacts the pace, so take your time to guarantee a quality, starry finish.
Can I Remove or Replace the Starry Sky Design Later?
Yes, you can remove or replace the starry sky design later. To do so, you’ll need to carefully remove the fiber optics and any adhesive used. Replacing the headliner involves detaching the existing material and installing a new one, allowing you to update or change the design whenever you like. Just take your time during removal to avoid damaging the ceiling or fiber optics, ensuring a smooth replacement process.
What Safety Precautions Should I Consider During Installation?
When installing your starry sky headliner, prioritize electrical safety by disconnecting the car battery before working with wiring. Handle tools carefully, avoiding slips or accidental cuts, and always use the correct tools for each task. Make sure of proper insulation of wires to prevent shorts, and work in a well-lit area. Taking these precautions helps protect you from injury and ensures a safe, successful installation.
Is It Suitable for All Car Models and Ceiling Types?
Like a tailor adjusting a suit, you’ll find the DIY starlight headliner isn’t suitable for all cars. It primarily works with compatible car models and specific ceiling materials. You need to check your vehicle’s compatibility before starting, as some ceiling types might require additional modifications or aren’t suitable at all. Ensuring your car’s interior matches the project’s requirements guarantees a smooth installation and stellar results.
How Do I Maintain or Clean the Fiber Optic Headliner?
You should regularly perform fiber optic maintenance by gently dusting the headliner with a soft cloth or microfiber towel to prevent dirt buildup. For headliner cleaning, use a mild interior cleaner and avoid harsh chemicals that could damage the fibers. Keep the fibers dry and avoid excessive scrubbing. This routine guarantees your starry night headliner stays vibrant and in good condition, maintaining its stunning appearance over time.
Conclusion
Once you’ve completed your DIY starlight headliner, you’ll feel like you’ve turned your car into a personal planetarium. Imagine driving at night and gazing up at your own starry sky—it’s like having a piece of the universe right above your head. Just like a night sky can inspire wonder, your customized ceiling transforms your daily drives into magical journeys. Now, every trip feels like an adventure among the stars.