
To brighten your dash, start by checking your current instrument panel lighting and choosing the right LED replacements that fit your sockets and color preferences. Gather the necessary tools, such as screwdrivers and resistors, then safely remove your instrument cluster by disconnecting the battery and accessing the panels. Swap out the dim bulbs with your LED options, test the setup, and make adjustments for maximum brightness. If you want to learn the full process, keep exploring the detailed steps ahead.
Key Takeaways
- Assess your vehicle’s electrical system and compatibility to determine suitable LED replacements.
- Gather necessary tools, such as screwdrivers, multimeter, and replacement LED bulbs, before beginning.
- Carefully remove the dashboard and instrument cluster, noting wiring connections for reassembly.
- Replace existing bulbs with compatible LEDs, ensuring proper fit and secure connections.
- Regularly maintain the LEDs and connections to ensure consistent brightness and longevity.
Assessing Your Vehicle’s Dashboard and Choosing the Right LEDs
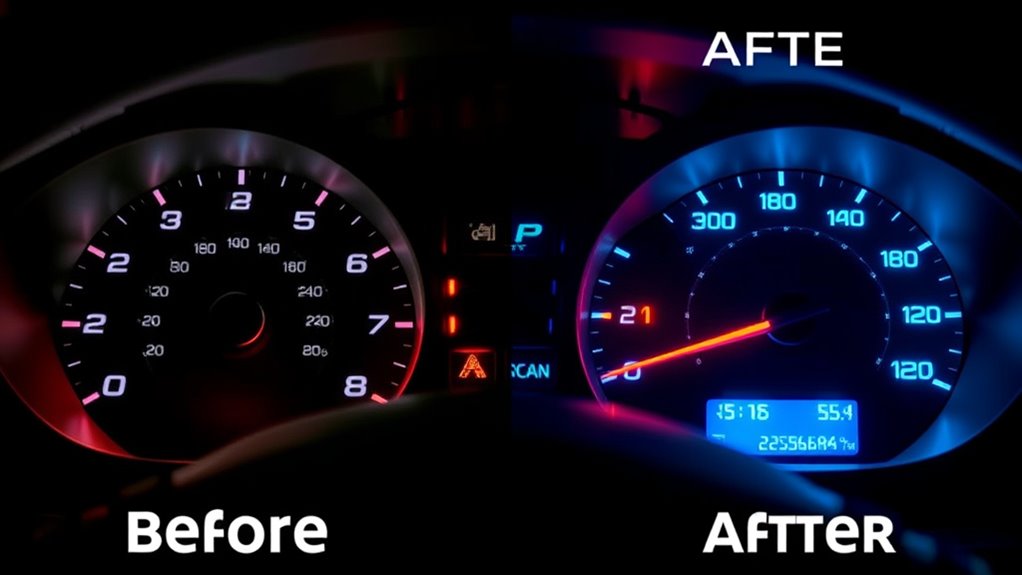
Before replacing your vehicle’s dashboard lights, it’s essential to assess your current instrument panel to determine what needs upgrading. Check the existing dashboard illumination to identify dim or malfunctioning lights. This step helps you decide whether you need a full LED swap or just specific areas. When choosing LEDs, consider the available LED color options; they can enhance visibility and personalize your vehicle’s interior. Think about your preferences—do you want a sleek white, vibrant blue, or subtle amber? Keep in mind that some dashboards may have size or socket restrictions, so measure carefully. Selecting the right LEDs ensures compatibility and a uniform appearance. Additionally, understanding the contrast ratio of your current dashboard lighting can help you select LEDs that provide a more vivid and clear display. Exploring European cloud innovation and energy-efficient options can inspire you to choose LEDs that are both sustainable and high-performance. Taking the time to evaluate your dashboard and explore the LED color options ensures a smoother upgrade process and a brighter, more modern display.
Gathering Tools and Materials for the Conversion Process
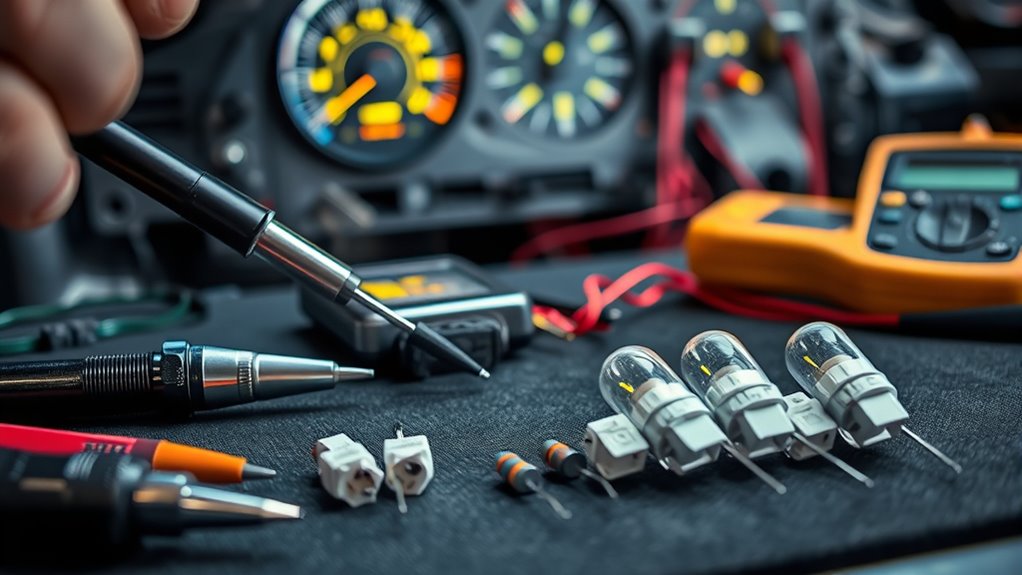
To start your LED conversion, gather all the necessary tools and materials to guarantee a smooth process. First, focus on tool selection—grab a screwdriver set, wire strippers, crimping tools, and possibly a soldering iron if you prefer secure connections. You’ll also need a multimeter to check voltage and test circuits. For material sourcing, choose the right LED bulbs compatible with your dashboard, along with resistors if needed. Collect wiring, connectors, and electrical tape for secure connections. Don’t forget to have gloves and safety goggles for protection. Ensuring you have all these tools and materials on hand will streamline the process, minimize interruptions, and help you achieve a professional-looking LED upgrade efficiently. Proper preparation is key to a successful conversion.
Safely Removing and Accessing Your Instrument Panel
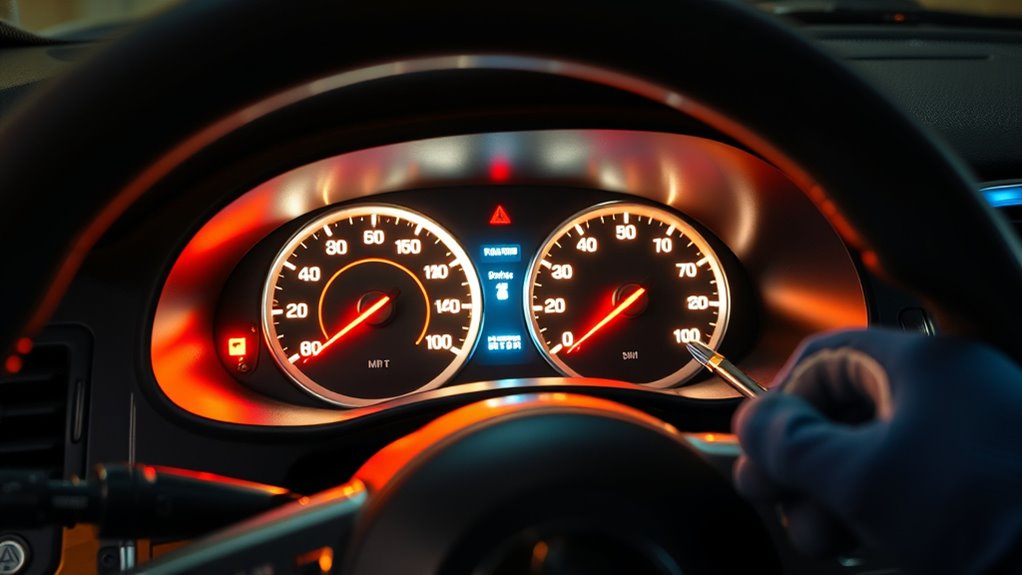
Before you start, make sure to disconnect the vehicle’s power to prevent any electrical shocks. Next, carefully remove the dashboard screws to free the instrument panel. Once the screws are out, you can access the instrument cluster for your LED conversion. Additionally, handling the panel gently can help prevent damage to sensitive components and ensure a successful upgrade. Proper handling techniques can make a significant difference in preserving your dashboard’s integrity, especially when working with delicate components like vetted dog accessories or other interior parts. Being aware of your vehicle’s specific gadget maintenance guidelines can further support a safe and effective upgrade process. Consulting your vehicle’s owner’s manual can provide additional insights into proper disassembly and reassembly procedures, safeguarding against unintended damage.
Disconnect Power Safely
When working on your instrument panel, it’s crucial to disconnect the power supply to prevent electrical shocks or damage. Start by locating the main power source, usually connected to the vehicle’s battery or fuse box. Before proceeding, turn off the ignition and remove the key to avoid accidental activation. Carefully disconnect the negative terminal of the battery to ensure circuit safety, which helps prevent short circuits or sparks. Use insulated tools to avoid accidental contact with live parts. Double-check that all power sources are disconnected before touching any wiring or components. Taking these precautions guarantees your work area is safe and reduces the risk of damaging sensitive electronics. Once the power is safely disconnected, you can confidently access your instrument panel for LED conversion.
Remove Dashboard Screws
Once you’ve confirmed that the power is disconnected, the next step is to remove the dashboard screws that secure the instrument panel. Carefully locate all screws holding the panel in place, which may vary depending on your vehicle’s make and model. Use a screwdriver suited for the screws to guarantee proper screw extraction without damaging the threads. As you remove each screw, keep them in a safe container so you don’t lose any. During dashboard removal, be gentle to avoid cracking or damaging surrounding panels. Once all screws are out, you’ll have easier access to the instrument panel for further steps. Proper screw extraction is key to avoiding stripped screws or damage, making the entire dashboard removal process smoother and safer. Additionally, understanding the panel structure can help prevent accidental damage during removal. Being aware of the component layout can also assist in efficiently completing the disassembly process. Familiarity with safety precautions ensures you avoid electrical hazards while working on your vehicle. Incorporating these removal techniques can further streamline the process and protect your vehicle’s interior. Recognizing the importance of correct tools can greatly improve the safety and efficiency of your work.
Access Instrument Cluster
After removing all the dashboard screws, gently pull back the instrument panel to gain access to the cluster. Carefully disconnect any wiring connectors, noting their positions for reassembly. This step allows you to safely inspect and prepare for LED upgrades, enhancing your dashboard aesthetics and offering customizable lighting color options. During this process, be cautious not to damage any clips or wiring. Once exposed, you can remove the instrument cluster from the dash for easier LED replacement or modification. Use the table below as a visual guide:
| Step | Tip |
|---|---|
| Remove screws | Keep them organized for reinstallation |
| Disconnect wiring | Note connector positions for reassembly |
| Gently pull cluster | Avoid applying excessive force |
Taking your time during instrument panel removal helps prevent damage and ensures a successful upgrade to vibrant, personalized dashboard lighting. Additionally, understanding automotive wiring can assist in safely handling electrical connections during this process.
Replacing Incandescent Bulbs With LED Lights
Replacing your incandescent bulbs with LEDs offers brighter illumination and longer-lasting performance. The installation process is straightforward, and most LEDs are compatible with your existing wiring. Understanding these benefits and compatibility guarantees a smooth upgrade to a more efficient instrument panel. Additionally, selecting LED options that are compatible with your vehicle’s wiring system can help ensure a seamless transition. For optimal results, consider choosing LEDs with appropriate voltage ratings to match your instrument panel’s electrical specifications. Being aware of vehicle electrical systems can further aid in preventing potential issues during installation. Recognizing electrical system compatibility can also help you select the best LED options for your specific vehicle setup, especially considering your vehicle’s electrical configuration.
Benefits of LED Conversion
Switching from incandescent bulbs to LED lights offers numerous advantages that can enhance your instrument panel’s performance and appearance. One major benefit is energy efficiency; LEDs consume substantially less power, reducing strain on your vehicle’s electrical system and potentially extending battery life. Additionally, LED conversion provides a clear aesthetic improvement by delivering brighter, more uniform illumination. This makes your instrument panel easier to read at a glance, especially in low-light conditions. LEDs also have a longer lifespan, meaning fewer replacements and less maintenance over time. Incorporating LED lights can also help prevent electrical issues caused by overheating or voltage fluctuations. Overall, upgrading to LED lights not only boosts visibility and safety but also gives your dashboard a modern, sleek look. It’s an investment that combines practicality with visual appeal, elevating your driving experience.
Installation and Compatibility
To install LED lights in your instrument panel, you’ll need to make certain of compatibility with your vehicle’s existing sockets and electrical system. Start by checking the type of bulbs your dash uses, as some vehicles require specific base types. LED color options vary, so choose a hue that matches your preferred aesthetic. Compatibility troubleshooting involves verifying voltage requirements and ensuring the LED replacements fit securely without causing flickering or error messages. Some vehicles might need resistors or load equalizers to prevent issues. Before installation, test the LEDs outside the dashboard to confirm proper operation. If you encounter problems, swap out incompatible bulbs or adjust wiring. Proper compatibility checks help guarantee a smooth upgrade, giving you a brighter, more modern instrument panel. Ensuring compatibility is essential for a safe and effective upgrade process. Additionally, consulting vehicle-specific electrical system guidelines can help prevent potential issues during installation. Performing a thorough system check prior to installation can further ensure that all components work harmoniously.
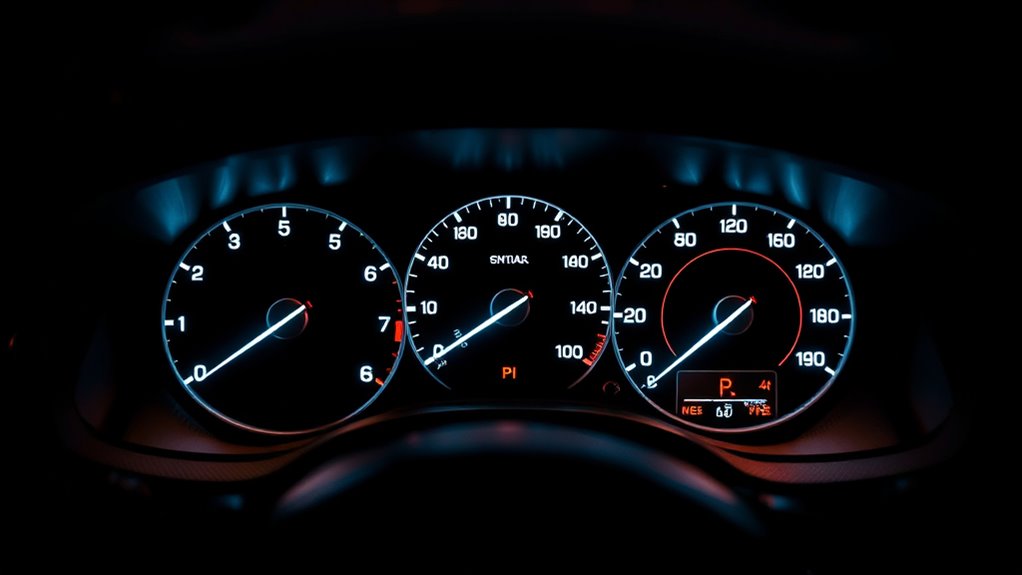
Testing and Adjusting Your New LED Setup
Before you begin testing, make sure all connections are secure and the power supply is turned off. Once everything looks good, power up your vehicle to check the lighting consistency across your dashboard. Observe how evenly the LEDs illuminate each gauge and indicator; uneven lighting may require minor adjustments. Use a multimeter or dashboard controls to fine-tune the brightness if available. Confirm that the LEDs aren’t flickering or dimming, which can affect visibility and bulb lifespan. If some lights appear inconsistent, double-check wiring connections. Remember that lighting quality is essential to ensure your LED setup enhances visibility and safety. Good navigation and mapping can help identify any wiring issues early on. Once satisfied with the brightness and uniformity, turn off the vehicle and re-examine the connections for safety. Proper testing guarantees your new LED setup is reliable, enhances visibility, and extends the longevity of your bulbs.
Tips for Maintaining and Enhancing Your LED Dashboard

After completing your LED installation and confirming everything works properly, maintaining your dashboard becomes key to ensuring long-lasting performance. Regular care keeps your LED color options vibrant and your dashboard customization looking sharp. Here are four tips to keep your LED dashboard in top shape:
- Clean your dashboard regularly to prevent dust buildup that can dim the LEDs.
- Inspect connections periodically to avoid loose wiring that may cause flickering.
- Adjust brightness settings as needed to prevent burnout and preserve LED lifespan.
- Experiment with different LED colors to refresh your dashboard’s look and enhance visibility.
Frequently Asked Questions
How Long Does an LED Dashboard Conversion Typically Take?
An LED dashboard conversion usually takes about 2 to 4 hours, depending on your installation timeline and experience. If you’re doing a DIY project, expect it to take longer, around 4 hours or more, especially if you’re new to wiring. A professional can typically complete the job faster, often within 2 hours, thanks to their expertise. Always plan for some extra time for troubleshooting and double-checking your work.
Can I Revert to the Original Bulbs After Upgrading to LED?
Yes, you can revert to the original bulbs after upgrading to LED, but you need to verify bulb compatibility. Check if your original bulbs match the socket type and size of your LEDs. Keep in mind, LED color options might differ from your original bulbs, so choose compatible bulbs that match your preferred color. Reverting is straightforward if you keep the original bulbs handy and ensure compatibility before swapping back.
Will LED Upgrades Affect My Vehicle’s Warranty or Insurance?
Upgrading to LED bulbs generally won’t affect your vehicle’s warranty or insurance, but you should check your warranty terms and consult your insurer. Warranty implications depend on whether the upgrade causes damage or malfunctions, so keep records of the installation. For insurance considerations, inform your provider about modifications to stay transparent. As long as the upgrade is reputable and properly installed, it shouldn’t cause issues with your warranty or coverage.
Are There Specific LED Brands Recommended for Automotive Dashboards?
You might stumble upon trusted brands like Philips or Sylvania, but your choice depends on your dashboard compatibility. When selecting LEDs, consider your preferred color options—red, blue, or white—to match your style. Coincidentally, many reputable brands now offer LEDs designed specifically for automotive dashboards, ensuring easy installation and reliable performance. Always check compatibility and reviews to find the best fit for your vehicle’s dashboard and aesthetic preferences.
What Are Common Issues Faced After Installing LED Instrument Panels?
After installing LED instrument panels, you might face dim lighting or flickering issues. These problems often occur due to compatibility issues with your vehicle’s electrical system or insufficient power supply. To fix them, check your wiring connections, make sure your LED bulbs are compatible, and consider installing resistors or a LED-specific flasher relay. Regularly inspecting your setup can help prevent persistent flickering and keep your dashboard well-lit.
Conclusion
Upgrading to LED dashboard lights transforms your driving experience, making your gauges clearer and more vibrant. Imagine driving at night, easily reading your speed and fuel levels without strain—like Sarah, who finally felt confident and safe on late-night trips after her upgrade. Don’t settle for dull, outdated gauges. With a little effort, you can brighten your dash and enjoy a safer, more enjoyable drive every day. Your car’s interior can truly reflect your style and attention to detail.