
When your turn signals flash rapidly after switching to LEDs, it’s because the vehicle’s flasher relay detects a lower electrical load and interprets it as a bulb failure. To fix this, you can install load resistors in parallel with the LED bulbs to mimic the original load, or replace the flasher relay with a unit compatible with LEDs. These options help restore normal flashing speeds. If you want to learn more about these solutions, keep exploring your options.
Key Takeaways
- Install load-resistive resistors parallel to LED bulbs to mimic incandescent load and prevent hyperflash.
- Replace the stock flasher relay with an LED-compatible or electronic relay designed for low-current loads.
- Ensure resistors are rated correctly to handle heat and match the power requirements of your LED setup.
- Disconnect the vehicle battery before wiring to ensure safety and proper installation.
- Consult your vehicle’s manual for specific relay and wiring locations to correctly address hyperflash issues.
If your turn signals are blinking rapidly, it’s a sign that something needs repairing. This common issue often occurs after upgrading your vehicle’s lighting to LEDs because they draw less current than traditional incandescent bulbs. The rapid blinking, known as hyperflash, happens because the vehicle’s flasher relay detects a lower load and interprets it as a bulb failure. To fix this, you need to address the underlying electrical mismatch, usually through resistor installation or replacing the flasher relay.
First, understand that the flasher relay controls your turn signal blinking rate. When you switch to LED bulbs, the relay senses a decreased current flow, triggering hyperflash. To resolve this, you can install resistors designed specifically for LED turn signals. Resistor installation involves wiring these resistors in parallel with your LED bulbs. They simulate the electrical load of traditional bulbs by increasing the current flow, convincing the flasher relay that everything is functioning correctly. Proper resistor installation is straightforward, but it’s essential to ensure you use the correct wattage and resistance ratings to prevent overheating or damage.
Installing resistors in parallel with LED bulbs mimics traditional load, fixing hyperflash effectively.
Alternatively, many vehicles are equipped with a thermal or electronic flasher relay that’s compatible with LED upgrades. Replacing your existing flasher relay with an LED-compatible one is often the most effective fix. These relays are designed to detect lower loads without triggering hyperflash, providing a seamless upgrade. When changing the flasher relay, locate the relay in your vehicle’s fuse box or under the dashboard, remove the old component, and install the new compatible relay. This step requires careful handling and sometimes consulting your vehicle’s manual for specific wiring instructions.
In some cases, resistor installation offers a quick, affordable solution, especially if you’re comfortable with basic wiring. It’s also a good option if you want to maintain your stock flasher relay. However, if you prefer a more permanent fix that requires less ongoing maintenance, replacing the flasher relay with an LED-specific model is often the better choice. Whichever method you choose, ensure you follow proper safety procedures, disconnect the vehicle’s battery before working on electrical components, and double-check your connections.
Ultimately, fixing hyperflash after LED upgrades involves either resistor installation to mimic the electrical load of incandescent bulbs or replacing the flasher relay with a compatible electronic or LED-specific version. Both solutions restore the normal flashing rate and eliminate the annoying rapid blink. By addressing the load mismatch proactively, you’ll enjoy the benefits of your LED upgrade without the distraction of hyperflash, ensuring your turn signals work reliably and look sharp.

iBrightstar 50W 6ohm Load Resistors for Fix LED Bulb Fast Hyper Flash Turn Signal Blink Error Code
4PCS 50W 6ohm Load Resistors + 8PCS Quick wire Clip.
As an affiliate, we earn on qualifying purchases.
As an affiliate, we earn on qualifying purchases.
Frequently Asked Questions
Can You Use Resistors With All LED Turn Signals?
Yes, you can use resistors with all LED turn signals, but resistor compatibility depends on your specific LED bulb types. Not all LEDs need resistors, especially if they’re designed to work with your vehicle’s electrical system. For non-compatible LED bulb types causing hyperflash, resistors help stabilize the system. Always check your LED bulb specifications to make sure of proper resistor compatibility and avoid issues like rapid blinking or hyperflash.
Will Fixing Hyperflash Affect My Vehicle’s Warranty?
Fixing hyperflash usually won’t affect your vehicle’s warranty if you use proper solutions like resistors or load equalizers. However, you should be aware of warranty concerns and manufacturer implications, as some manufacturers might view aftermarket modifications unfavorably. To avoid issues, keep documentation of the fix and choose reputable parts. Always check your vehicle’s warranty terms or consult your dealer before making modifications to guarantee you stay protected.
Are There Alternative Methods to Fix Rapid Blinking?
Yes, you can try resistor compatibility or relay installation as alternatives to fix rapid blinking. Resistors can be added to match the LED load, preventing hyperflash, while relay installation can bypass the vehicle’s original flasher system, providing a more seamless fix. Make sure any resistor you choose is compatible with your LED bulbs, and follow installation instructions carefully to avoid damage or electrical issues.
How Long Does the Installation Process Usually Take?
The installation process typically takes about 15 to 30 minutes, depending on your skill requirements. If you’re comfortable with basic wiring and have the right tools, you can complete it quickly. For beginners, it might take a bit longer. Make sure to follow the instructions carefully, turn off your vehicle power, and double-check connections to guarantee a smooth, safe installation.
Can Aftermarket Flasher Relays Be Installed Easily?
You can install aftermarket flasher relays easily, especially if you check their electrical compatibility first. The process is straightforward—just disconnect the old relay, plug in the new one, and secure it in place. The installation complexity is minimal, making it accessible even if you’re not a professional. With some basic tools and careful attention, you’ll have your turn signals functioning correctly without hassle or delays.

Bylikeho CF-13 LED Flasher Relay, Universal 12V Car Flasher Relay for LED Turn Signal Fixing Hyper Blink Flash, Fits Car SUV Motorcycle
[High Quality Materials]Our flash relay LED turn signal lights are made of carefully selected ABS plastic materials. Durable…
As an affiliate, we earn on qualifying purchases.
As an affiliate, we earn on qualifying purchases.
Conclusion
By replacing your turn signal relay or adjusting the load resistor, you can tame that stubborn hyperflash and restore harmony to your signals. Think of it as calming a restless storm—once you make these tweaks, your indicators will blink with the steady rhythm they’re meant to, like a well-conducted orchestra. Don’t let rapid blinking steal your confidence on the road. With a little effort, your LED upgrades will shine brightly and reliably, just as they were meant to.

2Pcs 50W 6Ohm Load Resistors LED Turn Signal, LED Load Resistor Kit for Fix LED Bulb Fast Hyper Flash Turn Signal Blink Error Code (Amber)
Fix Faults: Each LED bulb requires a 50W 6 ohm load resistor, which can effectively prevent rapid flashing,…
As an affiliate, we earn on qualifying purchases.
As an affiliate, we earn on qualifying purchases.
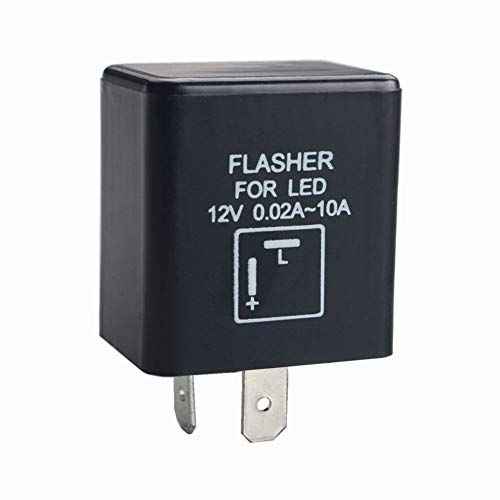
DEWHEL 12V 0.02A-10A 2-Pin CF-12 Automatic Electronic LED Flasher Relay Fix for Turn Signal Light Fast Hyper Flash
2 pin CF12 12V LED Flasher Relay. Suitable for motorcycle or scooter use to prevent turn signal hyper…
As an affiliate, we earn on qualifying purchases.
As an affiliate, we earn on qualifying purchases.