
To add a luxury glow to your car’s interior, choose high-quality LED strips that match your style and guarantee compatibility with your electrical system. Plan your layout carefully, placing lights in areas like footwells, door panels, and dashboard accents for maximum impact. Disconnect the battery safely, install the strips securely, and configure color and brightness settings. Test everything thoroughly and finish with proper sealing and maintenance. Keep exploring to learn all the tips for a flawless, stylish setup.
Key Takeaways
- Choose color-matched LED strips suitable for automotive use and plan strategic placement areas like footwells and door panels.
- Gather essential tools and follow safety precautions, including disconnecting the battery and securing wiring properly.
- Install LED strips securely with mounting brackets or double-sided tape, ensuring wiring is concealed and organized.
- Configure color modes and brightness levels to create a luxurious, customizable ambiance in your vehicle interior.
- Test the system thoroughly for even lighting, smooth color transitions, and secure connections before finalizing and sealing.
Choosing the Right LED Lighting for Your Vehicle
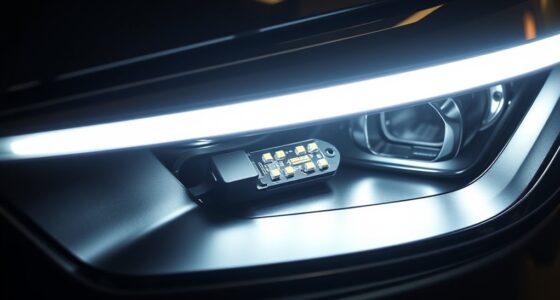
When selecting LED lighting for your vehicle, it’s important to think about both function and style. Your choice of LED color options can set the mood inside your car, from subtle whites to vibrant hues. Consider how the colors will complement your interior and your personal taste. Equally important is wiring compatibility; verify the LEDs you pick match your vehicle’s electrical system. Some LED kits come with connectors that fit standard wiring, making installation smoother. Check voltage ratings and connector types to avoid future issues. Picking the right LEDs involves balancing aesthetics with technical requirements, so you get a seamless, professional look without risking electrical problems. Incorporating color accuracy into your vehicle’s lighting setup can also help prevent common installation errors and ensure reliable operation. Understanding Free Floating principles can help you optimize your setup for a clean and clutter-free appearance. With careful selection, your interior lighting will not only look great but also function reliably.
Gathering Necessary Tools and Materials
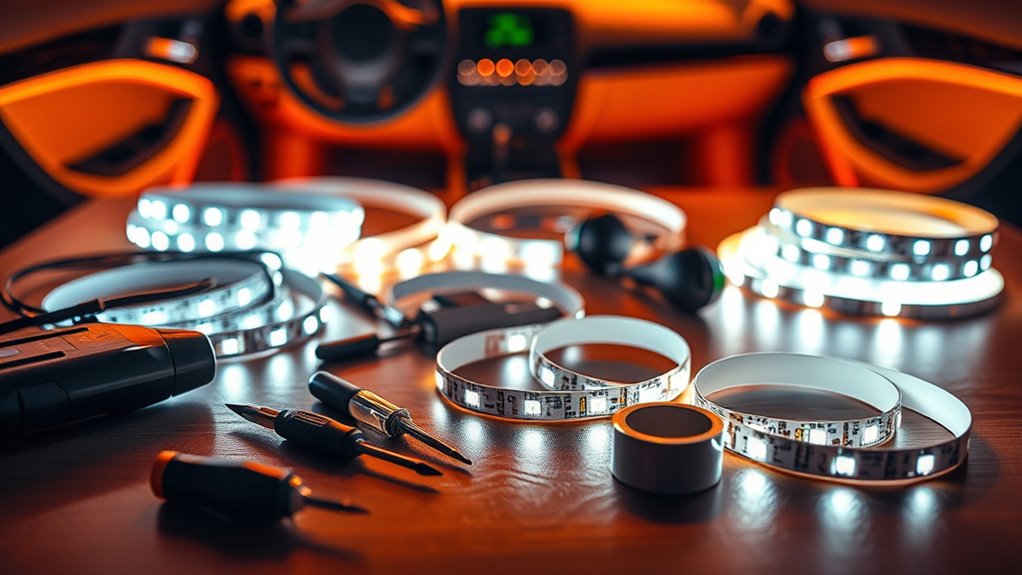
Before you start installing your ambient interior lighting, it’s vital to gather all the necessary tools and materials. Having everything on hand guarantees a smooth process and prevents multiple trips to the store. You’ll need a few basic items to get started:
Gather all essential tools and materials beforehand to ensure a smooth and hassle-free interior lighting installation.
- A soldering iron and wiring kit for secure connections
- Double-sided tape or mounting brackets to attach LEDs discreetly
- A multimeter to check connections and voltage levels
- Familiarity with body jewelry measurements can help you budget appropriately for your DIY project.
While working on your car audio system or wheel upgrades, make sure your workspace is organized. Proper tools help you avoid damage and ensure a professional finish. Additionally, understanding electrical safety is crucial to prevent accidents during installation. Keeping your workspace organized and well-stocked with these essentials can significantly improve your efficiency and the quality of your installation. It’s also helpful to review basic electrical concepts to troubleshoot potential issues effectively. Keep these essentials ready before you begin, so your interior lighting project goes seamlessly from start to finish.
Planning Your Ambient Lighting Layout
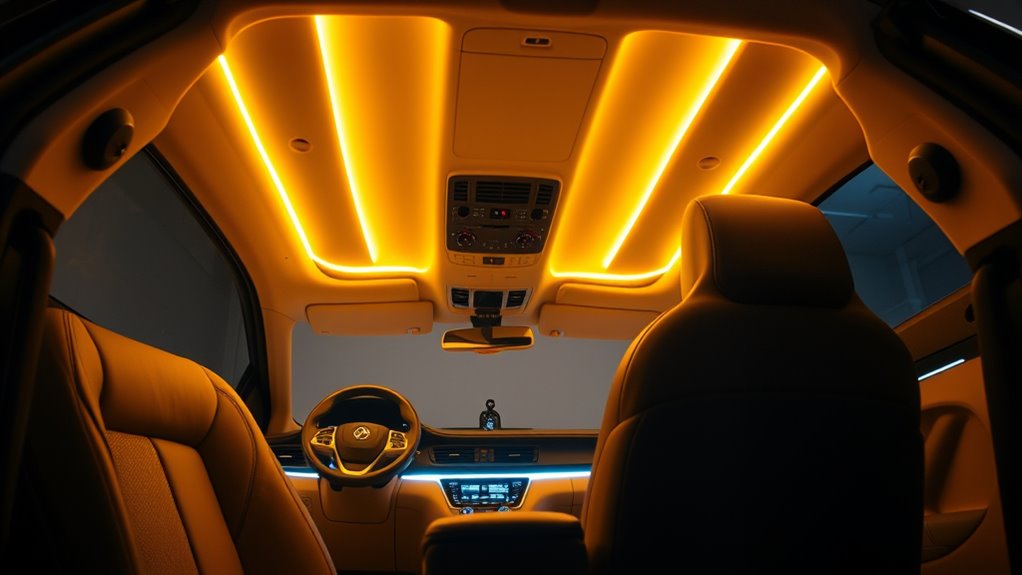
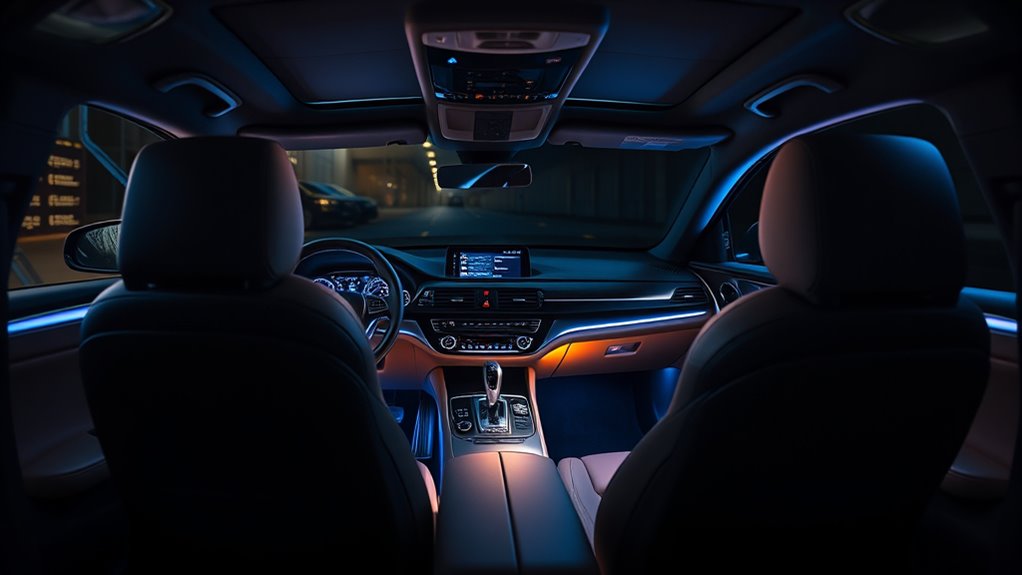
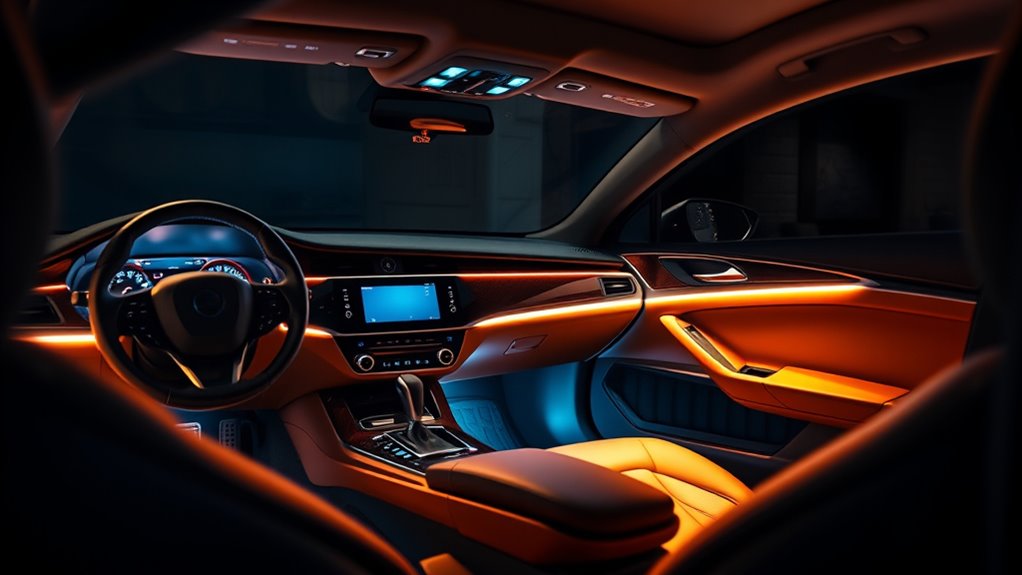
Planning your ambient lighting layout guarantees your installation looks professional and functions effectively. Start by deciding where you’ll place the lights for ideal lighting placement, considering areas like footwells, door panels, and dashboard accents. Think about how the lights will enhance the interior’s ambiance without causing glare or distraction. Achieving layout symmetry is key for a polished look, so balance the placement of lights on both sides of the vehicle. Measure carefully before drilling or attaching any components, and sketch a rough diagram to visualize the final effect. Keep in mind that a well-thought-out layout not only improves aesthetics but also ensures the lights are evenly distributed and easy to operate. Proper planning avoids mistakes and saves time during installation. Incorporating connected technology into your lighting setup can further optimize control and customization options. Additionally, considering smart automation features allows you to synchronize your lighting with other vehicle systems for a seamless experience. To ensure your design is both functional and attractive, consulting interior lighting design principles can provide valuable guidance. Understanding basic lighting principles can help you create a balanced and attractive interior glow.
Disconnecting Your Car’s Battery Safely

Before you start disconnecting your car’s battery, make sure you’re wearing safety gear like gloves and eye protection. Always disconnect the negative terminal first to prevent any sparks or shorts. Taking these precautions helps keep you safe throughout the process. Additionally, electrical safety is crucial to avoid accidents or damage to your vehicle’s electronics. To further protect your vehicle, consider securely storing your car’s electronic components during maintenance.
Prepare Safety Gear
To safely disconnect your car’s battery, you need to wear the right safety gear to protect yourself from sparks or electrical shocks. Proper protective gear minimizes risks during this process. Before starting, gather safety precautions like gloves and eye protection. Wear:
- Heavy-duty gloves to prevent electrical shocks and protect your hands
- Safety goggles to shield your eyes from sparks or debris
- Long-sleeved clothing to reduce skin exposure
- Additionally, understanding electrical safety procedures is crucial to avoid accidents while working with car batteries. Being familiar with farmhouse decor trends can also inspire you to create a cozy workspace while working on your vehicle.
- It is also helpful to consult security zone info to ensure your workspace remains safe and secure during your DIY project.
- Ensuring proper protective gear can significantly reduce the risk of injury or mishaps during battery disconnection. Incorporating safety equipment into your toolkit ensures you’re prepared for any unexpected issues that may arise.
These safety precautions ensure you’re shielded while working with the battery. Always double-check your gear before proceeding. Remember, safety is key to avoiding injuries or accidents. Using the correct protective gear makes the process safer and more efficient. Keep your safety gear close, and follow these precautions carefully to prevent any mishaps during the battery disconnection.
Disconnect Negative Terminal
Wondering how to safely disconnect the negative terminal of your car’s battery? Start by turning off your ignition and removing your key to prevent any electrical issues. Wear your safety gear and ensure you’re in a well-ventilated area. Loosen the nut holding the negative terminal clamp using the appropriate wrench, then carefully lift the cable away from the battery post. Disconnecting the negative terminal is crucial for battery safety and prevents accidental electrical shocks or shorts during your DIY project. This step is essential for electrical troubleshooting, especially when installing ambient interior lighting. Always remember to store the disconnected cable away from the battery to avoid accidental contact. Ensuring proper electrical safety measures is vital before performing any electrical work on your vehicle. Once complete, double-check that the terminal is fully removed before proceeding with any further work on your car’s electrical system.
Installing LED Strips in Key Interior Areas
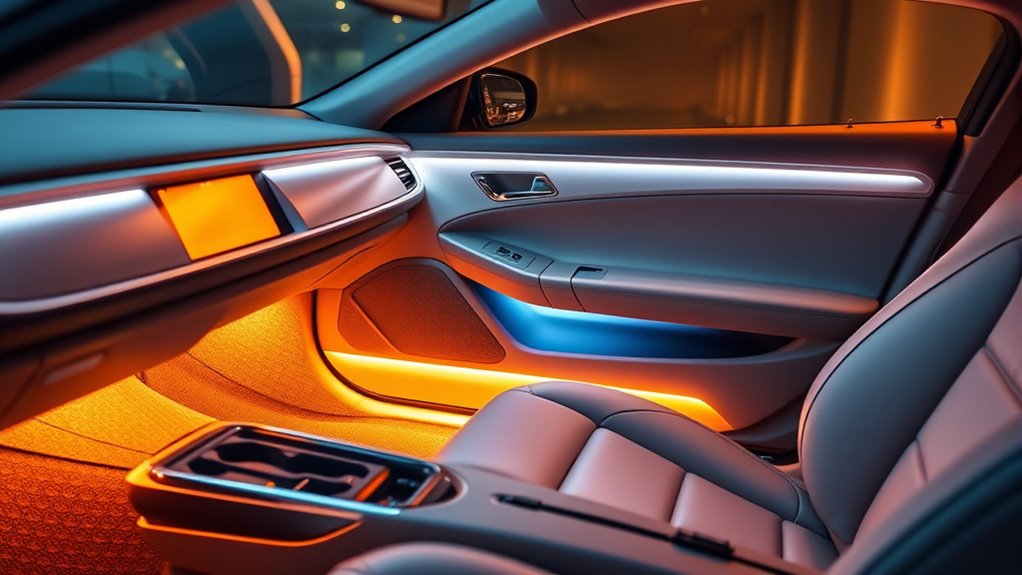
Have you considered how installing LED strips in key interior areas can transform your space? Proper LED strip placement ensures a seamless, luxurious glow where you want it most. Focus on areas like footwells, dashboard edges, or door panels for maximum impact. When choosing wiring color options, opt for colors that match your vehicle’s interior or blend discreetly for a clean look. Use double-sided tape or mounting clips to secure the strips firmly. Keep the wiring hidden along trim panels to maintain a sleek appearance. Visualize soft illumination under the dash, along the door sills, or around the center console—these details elevate your car’s ambiance. Precise placement and thoughtful wiring choices create a custom, high-end feel that’s both stylish and functional.
Connecting and Securing Wiring Properly

Securely connecting and hiding your wiring is key to achieving a clean, professional look for your ambient lighting. Proper wire routing prevents clutter and damage, so plan your paths carefully along trim panels or under carpets. Use connector types suited for your wires, like splice connectors or terminal blocks, to ensure secure, stable connections. Avoid loose or exposed wiring that can cause shorts or damage. Secure wires with zip ties or adhesive clips, keeping them tight against surfaces for a neat finish.
| Wire Routing Ideas | Connector Types |
|---|---|
| Route along trim panels | Splice connectors |
| Hide under carpets | Terminal blocks |
| Use existing wiring paths | Butt connectors |
| Secure with zip ties | Waterproof connectors |
| Keep wires tidy and out of sight | Quick-connects |
Configuring Color Settings and Brightness Levels

Now that your wiring is set, it’s time to customize your lighting. You can adjust the color modes to match your mood and fine-tune the brightness levels for the perfect ambiance. Let’s explore how to make these settings work best for your space.
Adjusting Color Modes
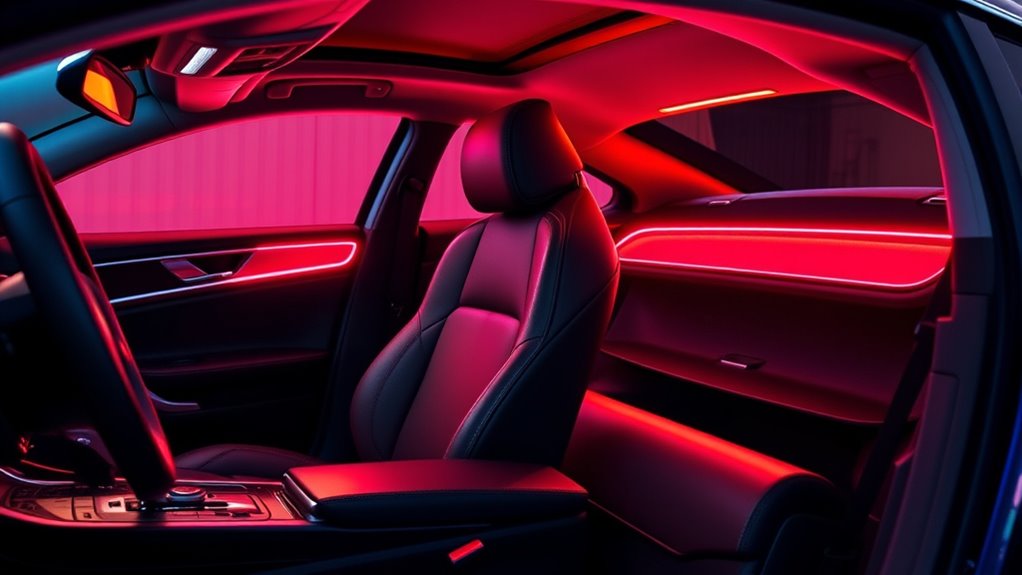
Adjusting color modes allows you to customize your ambient lighting to match your mood or setting. By selecting different modes, you can create smooth color shifts or keep a static hue that suits your vibe. Mode selection lets you switch effortlessly between presets, like calming blues or energizing reds. Imagine:
- Seamless color transition from soft purple to vibrant orange
- Static mode highlighting a specific color for focus or relaxation
- Dynamic effects that shift colors with music or driving rhythm
These options give you control over the atmosphere inside your car. Whether you want a subtle glow or a lively color change, adjusting color modes helps craft the perfect environment. Play with mode selection to find what feels right for your mood or occasion.
Fine-Tuning Brightness Levels
To achieve the perfect ambiance, fine-tuning brightness levels is essential, as it directly influences how vibrant or subtle your ambient lighting appears. Use dimming controls to adjust the light intensity to your preference, whether you want a soft glow or a bold statement. Proper ambient light calibration guarantees your lights aren’t too harsh or too dim, creating a balanced look that complements your car’s interior. Take your time testing different brightness settings, especially in various lighting conditions, to find what works best. Remember, subtle adjustments can make a big difference in the overall vibe. Fine-tuning helps you achieve a cohesive, luxurious feel that enhances your driving experience. Keep experimenting until you find the perfect level that suits your style.
Testing Your New Ambient Lighting System

Before fully enjoying your newly installed ambient lighting, it’s essential to test the system thoroughly. This guarantees your setup enhances your interior aesthetics and functions smoothly. Turn on the power and observe how the lights respond in different settings. Check for even illumination, color consistency, and proper wiring connections. During testing, you might notice:
- Smooth transitions between colors and brightness levels
- No flickering or dimming in certain areas
- All lights responding correctly to your control inputs
This step confirms that your ambient lighting creates the desired luxury glow without any glitches. Proper testing helps you identify potential issues early, so you can make adjustments for a seamless, stunning interior aesthetic that elevates your driving experience.
Finishing Touches and Ensuring Durability
To guarantee your ambient lighting lasts, you should seal and protect the lights from dust and moisture. Using quality connectors helps maintain a secure connection and prevents future issues. Regular maintenance checks keep everything in top shape and extend the lifespan of your lighting system.
Seal and Protect Lights
Sealing and safeguarding your ambient lighting ensures it stays vibrant and functional over time. To do this effectively, apply a light sealant or a protective coating over the LEDs and wiring. This step prevents dust, moisture, and UV damage from dulling your glow.
- Use a clear, flexible light sealant to cover exposed connections, ensuring they stay secure.
- Apply a thin, even layer of protective coating over the LED strips for added durability.
- Make sure to avoid thick layers that could interfere with light diffusion or wiring flexibility.
This finishing touch not only prolongs the life of your project but also keeps your interior looking sleek and professional. Proper sealing guarantees your luxury glow remains bright and intact for years to come.
Use Quality Connectors
After sealing and protecting your LED strips, the next step is to guarantee your connections are secure and durable. Using quality connectors is essential for reliable performance and safety. Confirm your connectors are compatible with your LED strips and wiring standards to prevent issues like loose connections or shorts. Opt for connectors designed specifically for automotive use, which withstand vibrations and temperature fluctuations. Proper connector choice minimizes the risk of corrosion and disconnection over time. Always double-check that the connectors fit snugly and are rated for the current your lighting system requires. By prioritizing connector quality and compatibility, you’ll create a clean, professional look that lasts, providing a luxurious glow without interruptions or hazards.
Regular Maintenance Checks
Regular maintenance checks are essential to guarantee your ambient interior lighting remains reliable and looks its best over time. Regularly inspect your wiring connections and make sure the LEDs are securely mounted. Keep an eye on your vehicle’s battery health, as a weak battery can cause flickering or dim lighting. Also, check your tire pressure; maintaining proper pressure ensures your car runs smoothly, preventing vibrations that could loosen connections. To stay on top of maintenance, consider these tasks:
- Verify lighting connections are tight and free of corrosion
- Monitor battery voltage and replace if it dips
- Ensure tire pressure is within recommended levels
These simple steps help preserve the glow’s consistency and prevent potential issues that could affect your car’s electrical system or driving safety.
Tips for Maintenance and Customization

Maintaining your ambient interior lighting guarantees it continues to enhance your space effectively. Regularly check connections and clean the light strips to prevent dust buildup that can dim the glow. Customization is key—adjust colors and brightness to match your mood or the interior scent you prefer, creating a more relaxing environment. Consider integrating lighting with seat comfort features, like adjusting brightness based on your seat position or ambient noise levels. When customizing, ensure your wiring is secure and concealed to avoid distractions while driving. Keep spare parts or extra LED strips handy for quick replacements. By staying attentive to these details, your ambient lighting remains a vibrant, mood-enhancing feature that complements your interior and elevates your driving experience.
Frequently Asked Questions
Can Ambient Lighting Affect My Vehicle’s Warranty?
Ambient lighting can affect your vehicle’s warranty if it conflicts with manufacturer policies. If you install DIY ambient lighting that causes damage or alters the electrical system, warranty implications could arise. Always check your car’s warranty terms and manufacturer policies before customizing. To avoid issues, opt for approved products and professional installation when possible, ensuring your modifications won’t void your warranty.
What’s the Best Way to Hide Wiring Cables?
Imagine a sleek, seamless look—cable concealment is your secret weapon. You can hide wiring cables behind panels, under carpets, or along trim lines using wiring management clips and adhesive channels. Carefully route the cables to avoid pinching or exposure, then secure everything neatly. This not only keeps your interior looking refined but also prevents damage. With patience and precision, you’ll achieve a professional finish that truly elevates your car’s ambiance.
Are There Safety Concerns With DIY Ambient Lighting?
Yes, there are safety concerns with DIY ambient lighting if you don’t follow proper installation safety and wiring regulations. You might risk electrical shorts, fires, or damaging your vehicle’s electrical system. Always make certain you use appropriate wiring, secure connections, and avoid overloading circuits. If you’re unsure, consulting a professional or following detailed guides helps prevent hazards and ensures a safe, successful installation.
How Long Does a Typical Installation Take?
Imagine your car as a canvas waiting for its glow; installation time varies but usually takes 2-4 hours. You’ll need basic tools like wire strippers, a screwdriver, and perhaps a fuse tap. With patience and focus, you’ll transform your interior into a luminous masterpiece. Rushing can lead to mistakes, so set aside enough time to carefully connect and hide wires, ensuring a sleek, professional look that elevates your driving experience.
Can I Add Voice Control to My Ambient Lighting?
Yes, you can add voice control to your ambient lighting, but it depends on compatibility options. First, check if your lighting system supports smart home integrations like Alexa, Google Assistant, or Siri. If it does, you can connect it to compatible smart devices and control your ambient lighting with voice commands. If not, consider upgrading to a system that offers voice control compatibility for seamless, hands-free operation.
Conclusion
With your new ambient lighting, your car now radiates a luxurious glow, transforming every drive into a scene straight out of a sci-fi film. Just like assembling an intricate spaceship in your garage, you’ve customized your space with care and precision. Keep your LEDs clean and check connections regularly. As you cruise, enjoy the cozy, elegant atmosphere you’ve created—it’s your very own modern sanctuary on wheels. Drive safe and bask in your DIY masterpiece!