
To avoid mistakes when installing an aftermarket car stereo, double-check that your wiring harness matches your vehicle’s specifications and never cut or splice wires unless absolutely necessary. Use the correct mounting brackets and follow each step carefully—skipping instructions can lead to loose fitting or damage. Secure all connections properly and test everything before finalizing. If you keep these tips in mind, you’ll guarantee a safe, professional-looking install. Keep going to learn more about perfecting your setup.
Key Takeaways
- Verify compatibility of the wire harness and mounting brackets with your vehicle and stereo model.
- Follow the manufacturer’s wiring diagram and installation instructions carefully.
- Avoid cutting or splicing wires unless absolutely necessary, and use proper connectors if so.
- Secure wiring and harnesses firmly to prevent rattling and accidental disconnections.
- Test all functions thoroughly before completing the installation to ensure safety and proper operation.
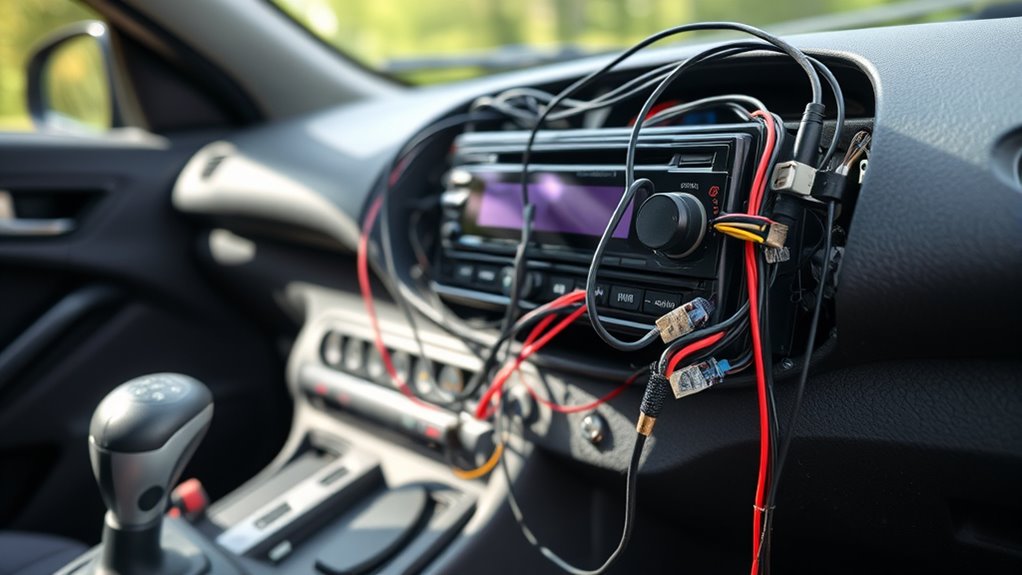
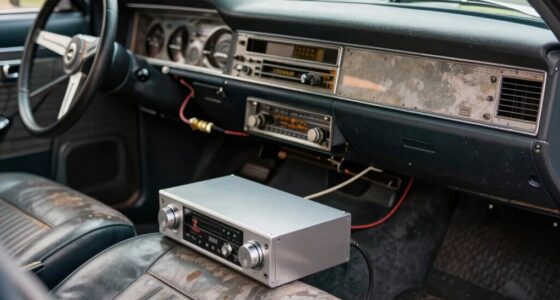
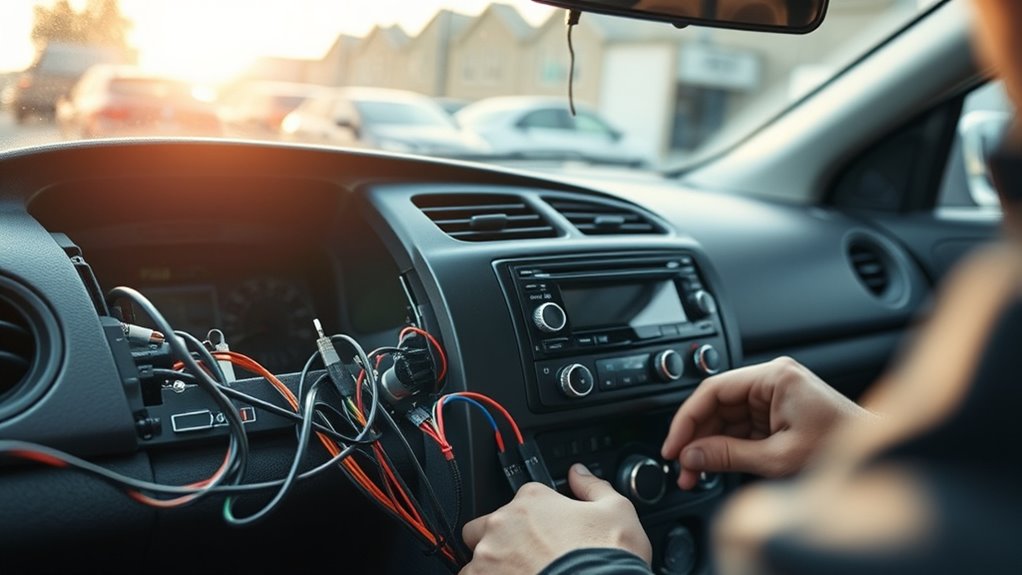
Have you ever considered how easy it is to make mistakes when installing a car stereo? Many DIY enthusiasts jump into the project excited but overlook some essential details that can cause issues later. One common mistake involves not paying enough attention to wire harnesses. These connectors are designed to match your car’s wiring system precisely, but if you don’t double-check compatibility or mishandle them, you could end up with poor audio quality, shorts, or even damage to your vehicle’s electrical system. Always use the correct wire harness for your specific make and model. This not only simplifies the installation but also guarantees a secure and reliable connection. Avoid cutting or splicing wires unless absolutely necessary, and if you do, be sure to use proper connectors and insulation. Properly secured wire harnesses prevent rattling and accidental disconnections, which can lead to frustrating troubleshooting later on. Additionally, understanding vetted installation procedures ensures you avoid common pitfalls that could compromise safety or functionality.
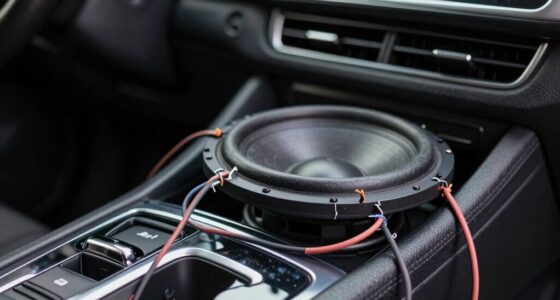
Another often-overlooked aspect is mounting brackets. These brackets are essential for securing your new stereo unit firmly in place, preventing vibrations or movement that can damage internal components. Failing to use the correct mounting brackets or skipping them altogether can result in a loose stereo that shifts or rattles during driving. This not only affects the aesthetic appeal but can also compromise the stereo’s functionality over time. Before starting, verify that you have the right mounting brackets for your vehicle’s dash and stereo model. Follow the manufacturer’s instructions carefully; improper installation can cause misalignment or damage to your dashboard. If brackets aren’t included, don’t try to improvise with makeshift solutions—invest in the proper hardware to guarantee a professional, secure fit.
It’s also tempting to ignore the importance of reading the stereo’s manual thoroughly. Many mistakes happen because installers assume they know everything or skip steps. Take your time to understand the wiring diagram, mounting procedure, and safety precautions. This knowledge helps you avoid shortcuts that could lead to electrical issues or physical damage. Remember that patience and attention to detail make all the difference. If you’re unsure about any step, consult online tutorials or seek advice from experts. Rushing through or skipping fundamental steps can turn a straightforward install into a complicated, costly repair.
In the end, taking the time to properly handle wire harnesses and mounting brackets, and following detailed instructions, guarantees your new stereo operates flawlessly. You’ll enjoy better sound quality, a safer installation, and peace of mind knowing you’ve done the job right.

Scosche FD16B Stereo Wiring Harness Compatible with Select Non-Amplified 1998-2011 Ford, Lincoln, Mazda, Mercury and Nissan Vehicles – Car Stereo Harness – Check Vehicle List in Images for Your Model
Convenient Solution – Scosche FD16B Radio Installation Harness allows a new aftermarket radio to be installed in select…
As an affiliate, we earn on qualifying purchases.
As an affiliate, we earn on qualifying purchases.
Frequently Asked Questions
Can I Install a New Stereo Without Disconnecting the Car Battery?
You should disconnect the car battery before installing a new stereo to guarantee battery safety. This step prevents electrical shorts and protects your vehicle’s electronics. While some might skip this, it’s risky and can damage stereo compatibility components. Always disconnect the negative terminal, follow manufacturer instructions, and double-check connections. Taking these precautions helps avoid potential issues, ensuring a smooth installation and safe operation of your aftermarket stereo.
Do I Need Special Tools for Aftermarket Stereo Installation?
Yes, you’ll need some special tools for aftermarket stereo installation. Basic tools include a wiring harness adapter, a wire stripper, and screwdrivers. These wiring harnesses make connecting your stereo easier and safer, ensuring you don’t cut or damage wires. Depending on your car, you might also need panel removal tools. Having the right tools prevents damage and simplifies the installation process, making it smoother and more secure.
Will Installing a New Stereo Affect My Vehicle’s Warranty?
Installing a new stereo typically doesn’t void your vehicle’s warranty, but it can have warranty implications if it causes damage or bypasses manufacturer restrictions. You need to be careful and follow the manufacturer’s guidelines to avoid voiding warranty coverage. Always check your vehicle’s warranty policy and consult the manufacturer or dealer before making modifications, especially if you’re unsure about how it might affect your warranty coverage.
How Do I Connect a Bluetooth-Compatible Stereo Properly?
To connect a Bluetooth-compatible stereo properly, start with Bluetooth pairing by enabling Bluetooth on your device and your stereo. Follow the stereo’s prompts to find and connect to your device. Once connected, adjust the audio settings for peak sound quality. Make sure your device stays within range, and test the connection by playing music or calls. This way, you enjoy seamless Bluetooth performance without any issues.
Is Professional Installation Necessary for a Basic Stereo Upgrade?
Think of upgrading your stereo like assembling a puzzle; you might succeed with DIY tips, but professional installation can save you from common pitfalls. While a basic stereo upgrade seems straightforward, mistakes like improper wiring or neglecting compatibility can cost you more in the long run. If you’re comfortable with electronics and follow clear instructions, you might handle it yourself. Otherwise, a pro guarantees everything’s wired correctly and functions flawlessly.

NuIth Double DIN Installation Kit, Universal Fit Metal Radio/DVD Player/Fitting Cage Mounting Bracket, Car Stereo Mounting Frame W/ Screws, 2.8x3x0.9 Inches
Universal Compatibility: double din stereo installation kit is 2.8x3x0.9 inches, is designed to fit most aftermarket double DIN…
As an affiliate, we earn on qualifying purchases.
As an affiliate, we earn on qualifying purchases.
Conclusion
Think of installing your car stereo like steering a river—you don’t want to hit rocks that can damage your boat. Avoid rushing, follow the right steps, and double-check your work. By avoiding common mistakes, you’ll keep your ride smooth and sound great. Remember, a careful approach guarantees your journey is enjoyable, not bumpy. So stay vigilant, and soon you’ll be sailing with a perfectly installed stereo, ready to hit the road with confidence.

Scosche ICCR3BN Single DIN Radio Install Dash Kit Compatible with Select 2002-07 Chrysler, Dodge & Jeep Vehicles – Complete Basic Car Stereo Installation Kit – See Vehicle Fit Guide in Images
Perfect Fit – Designed specifically for select 2002-07 Chrysler, Dodge & Jeep vehicles, the ICCR3BN complete basic radio…
As an affiliate, we earn on qualifying purchases.
As an affiliate, we earn on qualifying purchases.

NuIth Double DIN Radio Dash Kits for Nissan Altima 2007-2012 with Non Digital A/C Climate Control, Altima 2Din Stereo Wiring Harness Adapter, Altima Trim Bezel Mount Housing Bracket
Compatibility List: Double din installation dash kit for Nissan Altima 2007 2008 2009 2010 2011 2012
As an affiliate, we earn on qualifying purchases.
As an affiliate, we earn on qualifying purchases.